
Study timepoints are the visits in a study's protocol (for example Screening, Baseline, Month 3). Each one holds the forms to complete at that visit. Load the participant, then click Study Timepoints in the side menu.
Viewing a participant's study timepoints
-
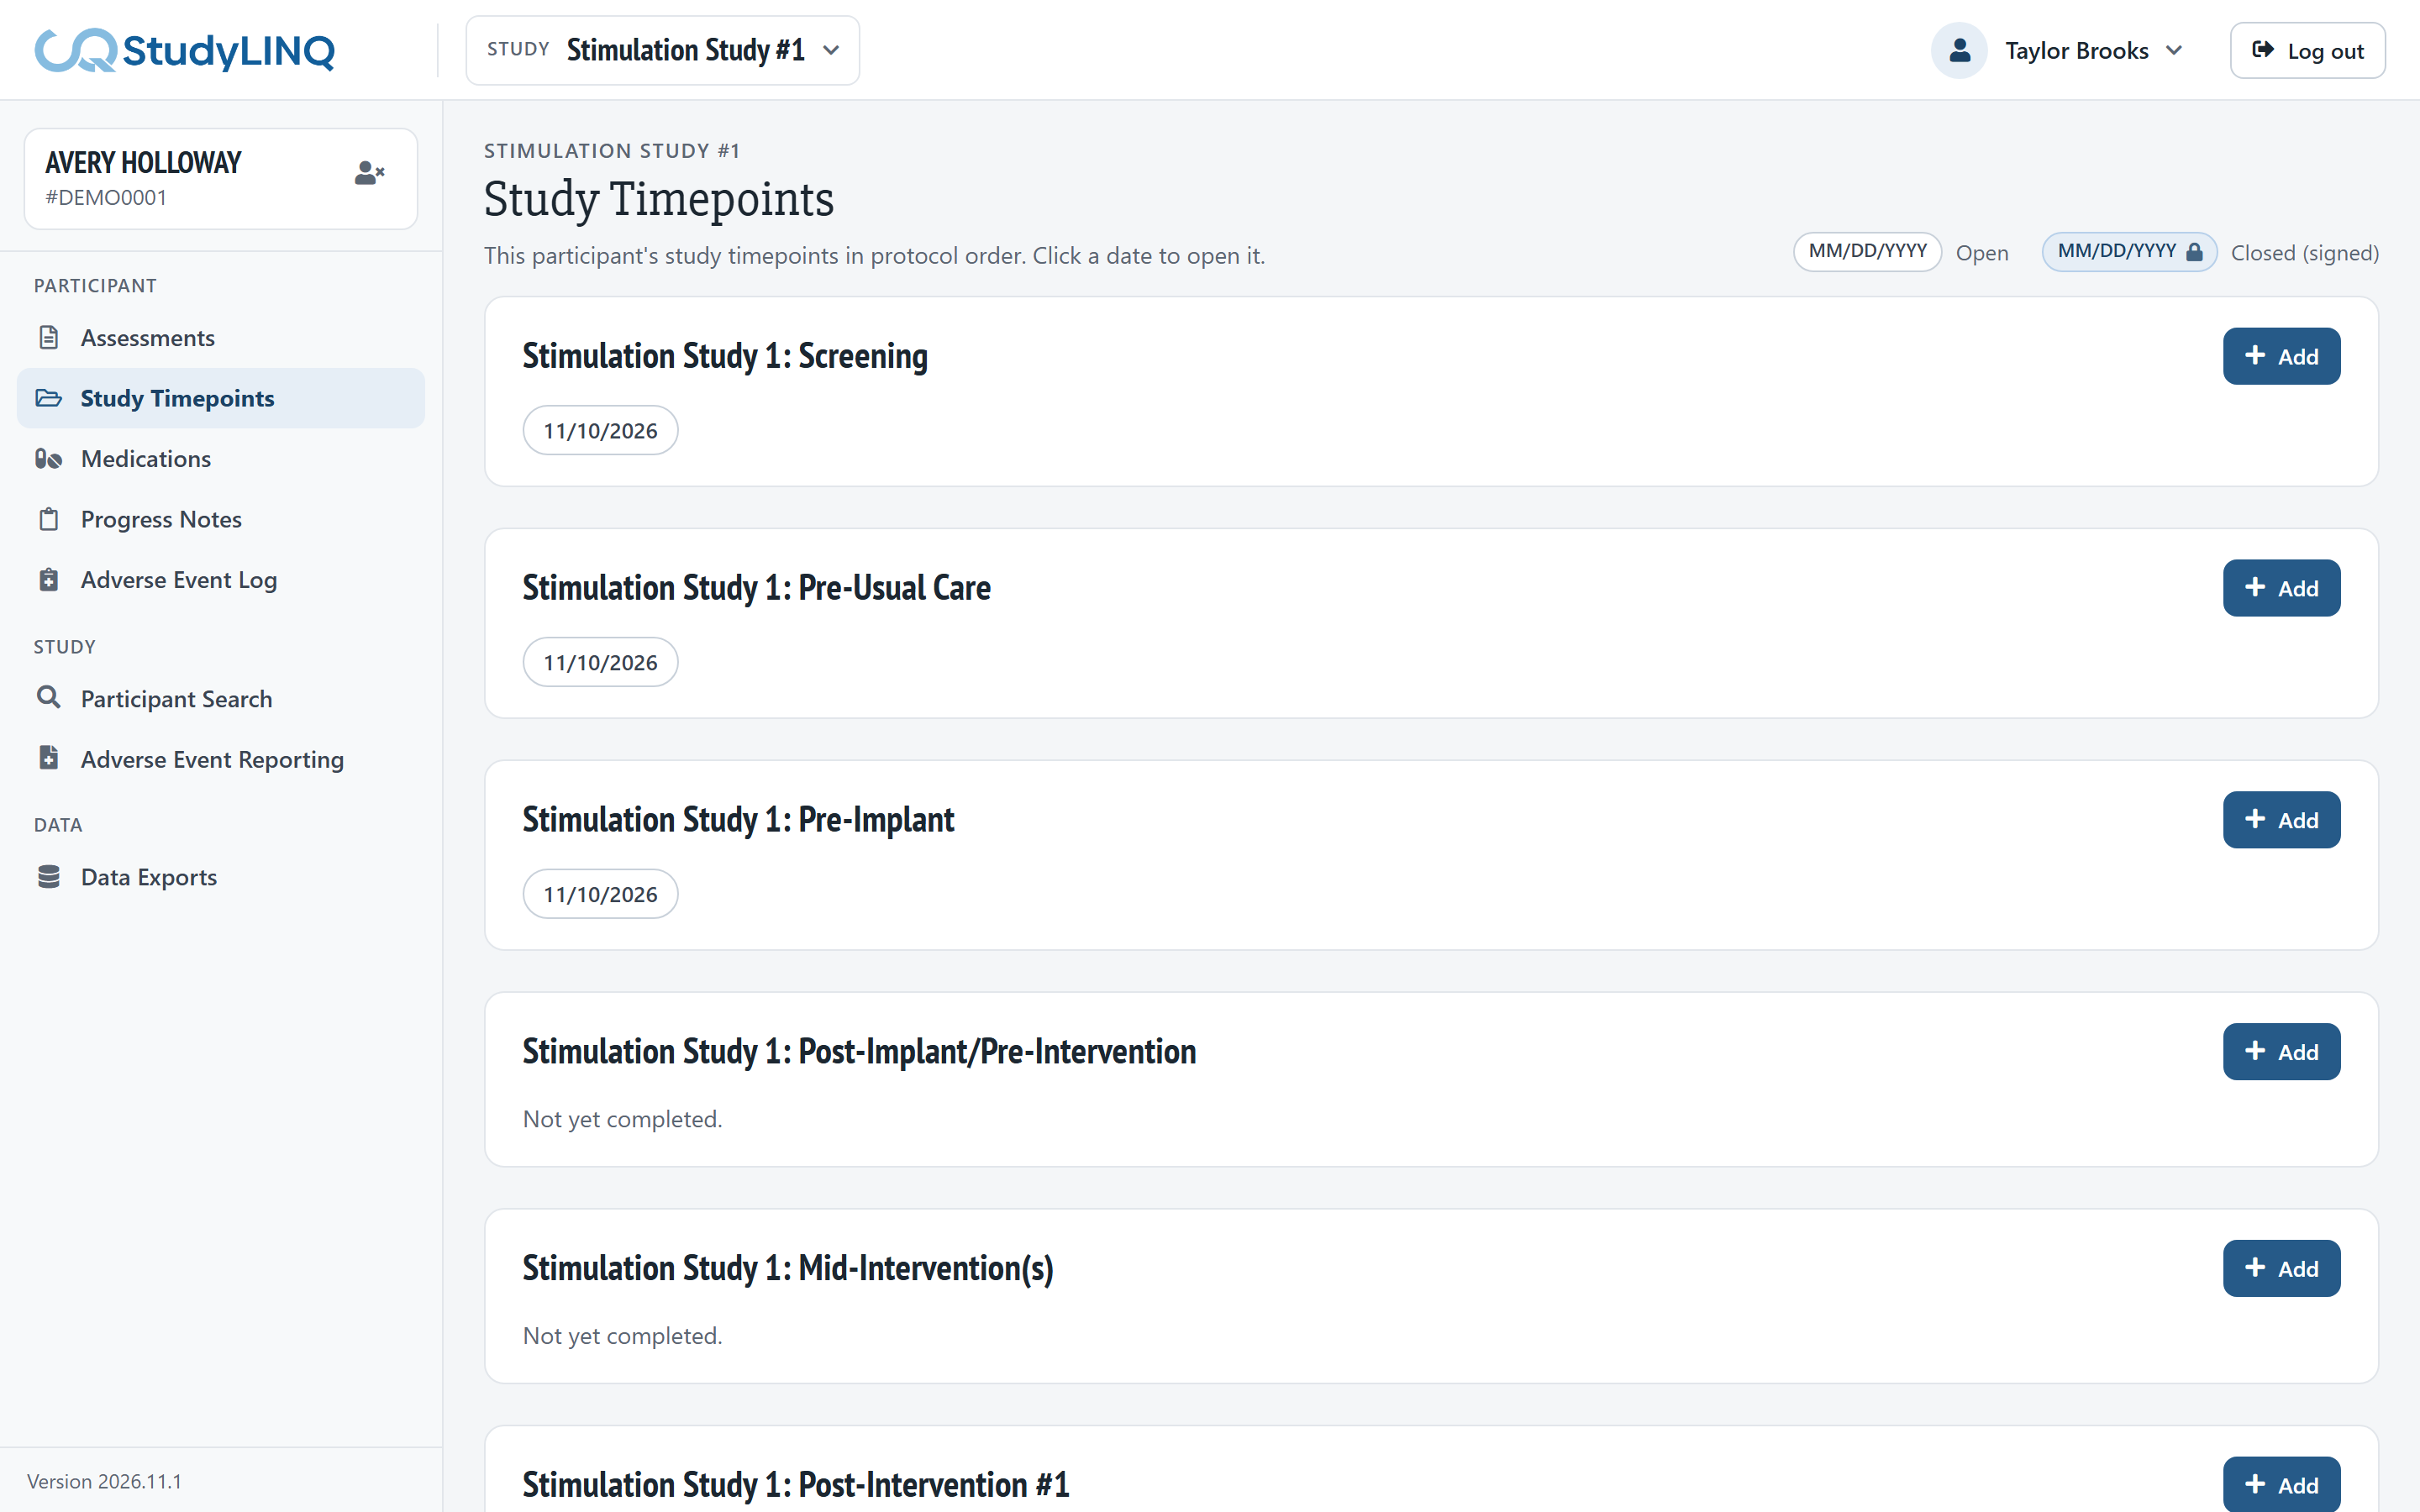
Each timepoint has a card, in protocol order.
-
The dates on a card are that participant's entries for the timepoint. A signed (closed) entry is marked. Click a date to open it.
Adding a study timepoint
-
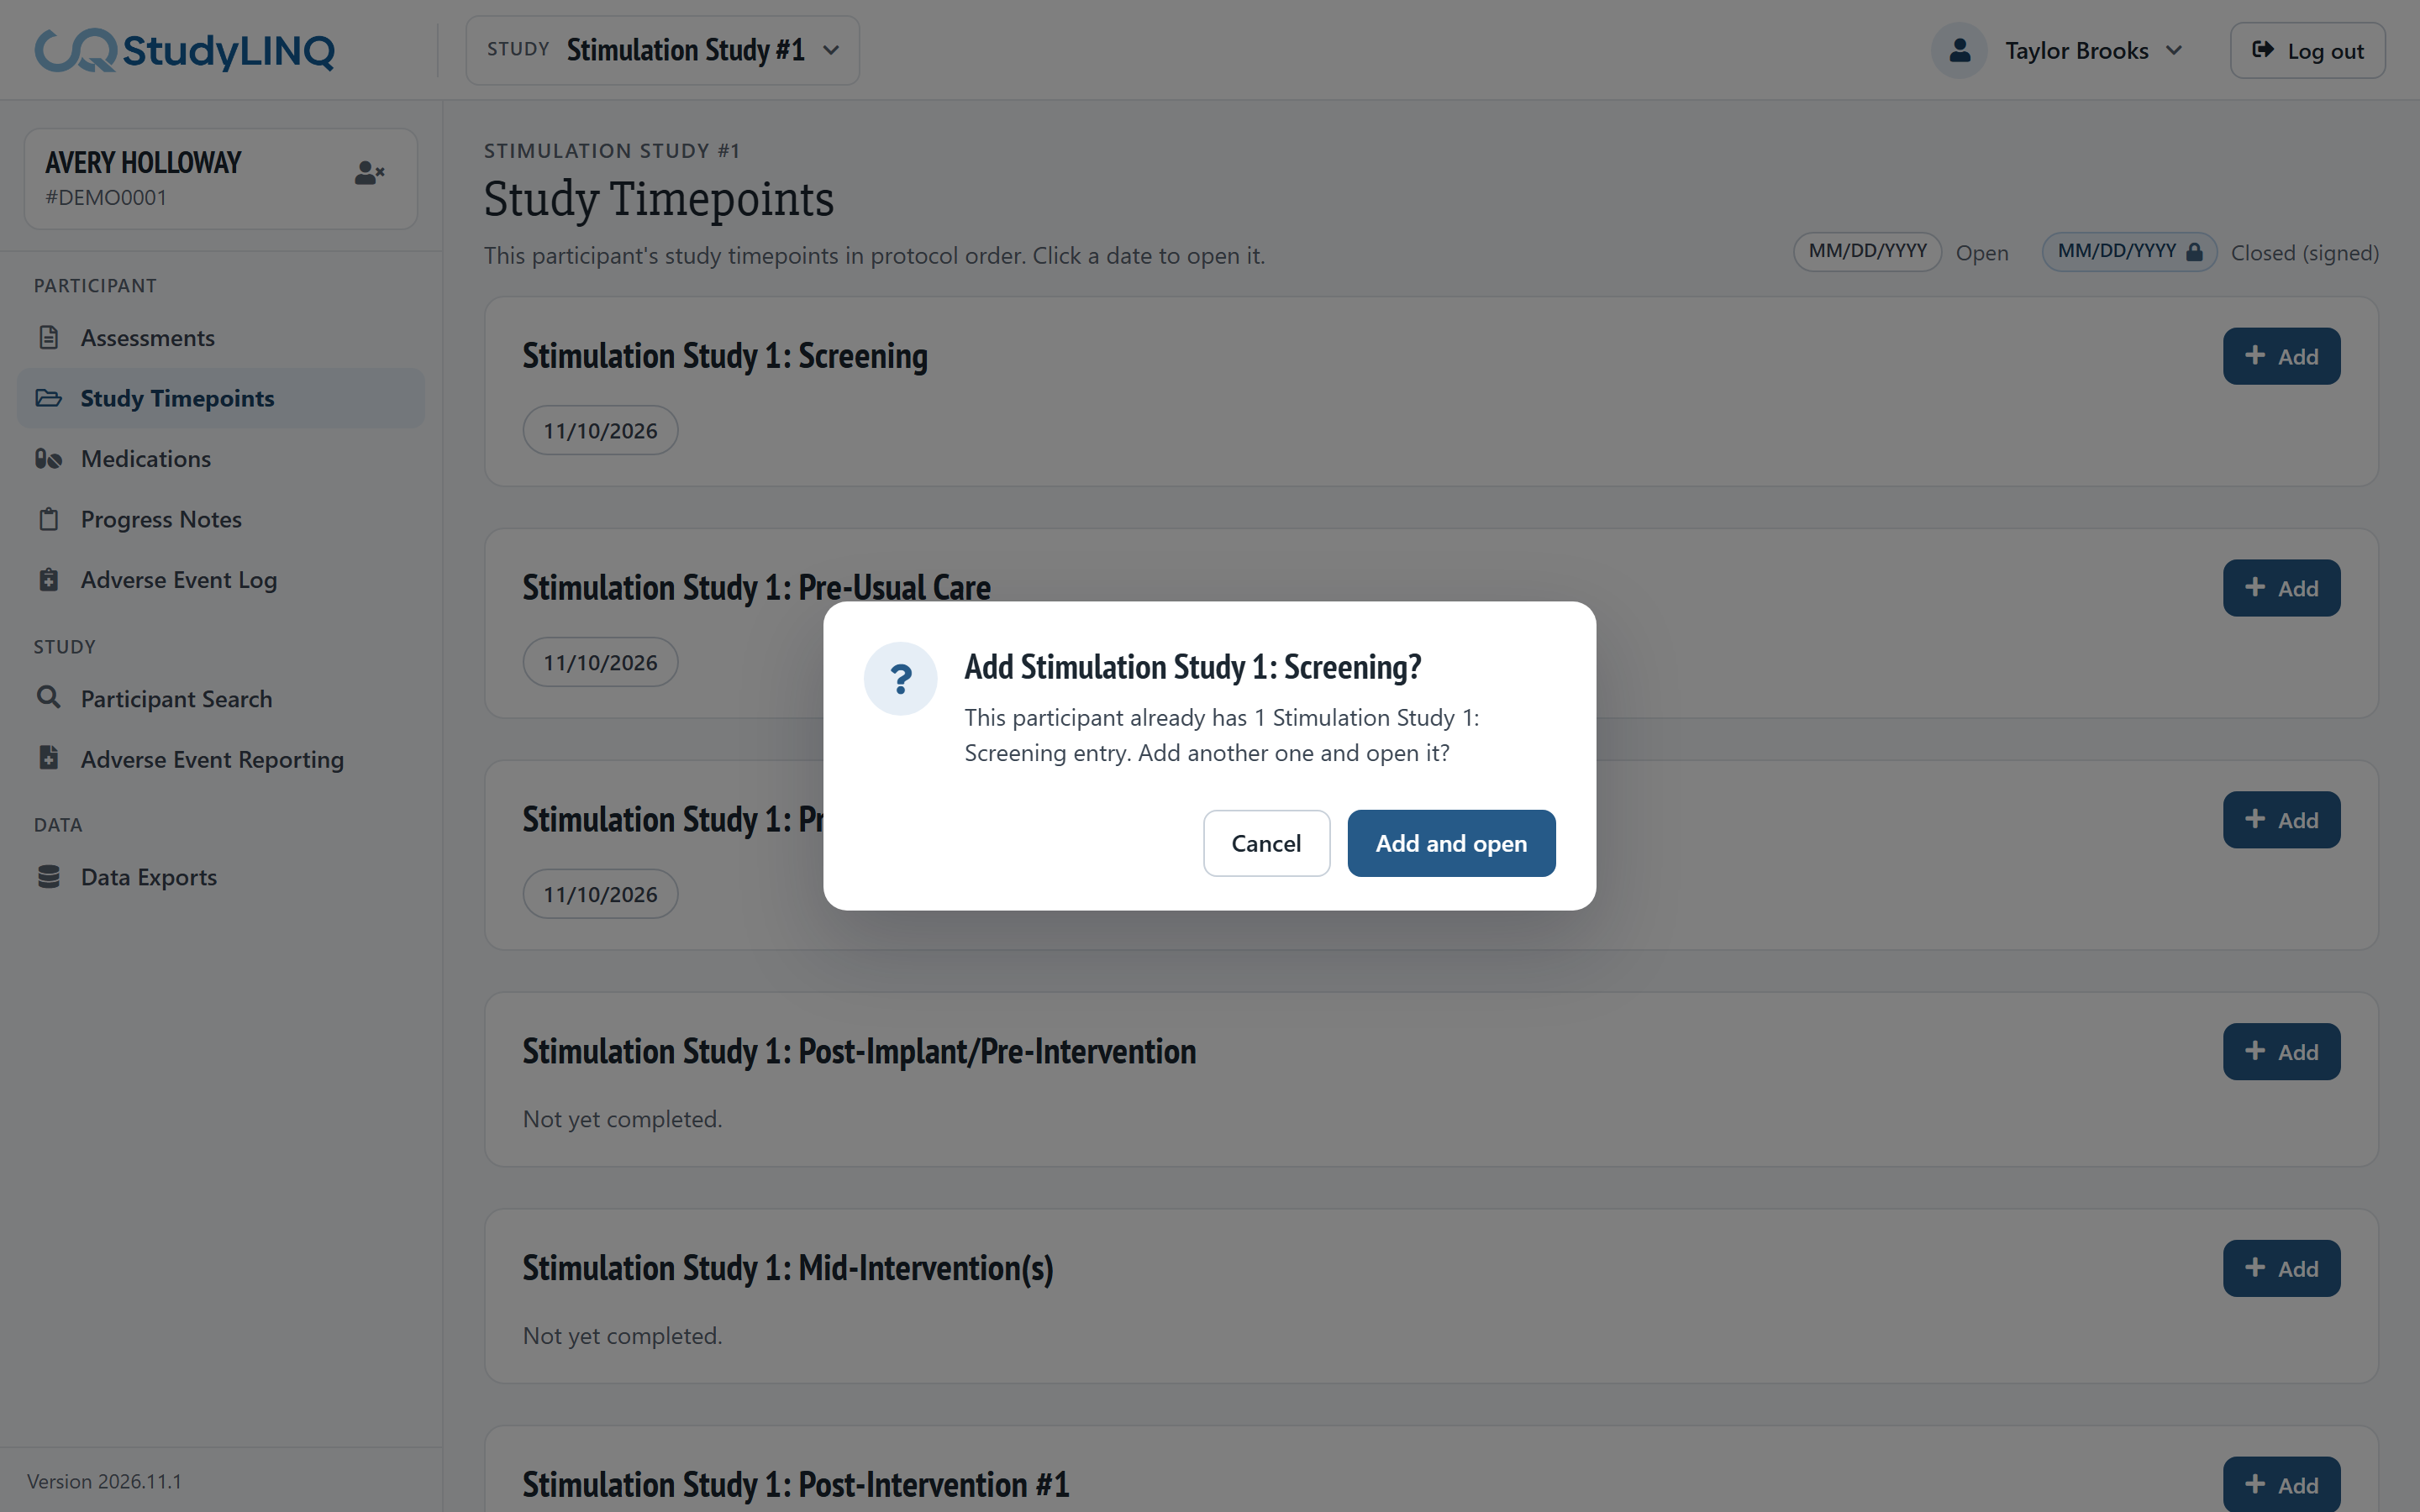
On the timepoint's card, click Add.
-
Click Add and open to confirm. If the participant already has this timepoint, the window says how many entries there are.
Completing the forms in a timepoint
-
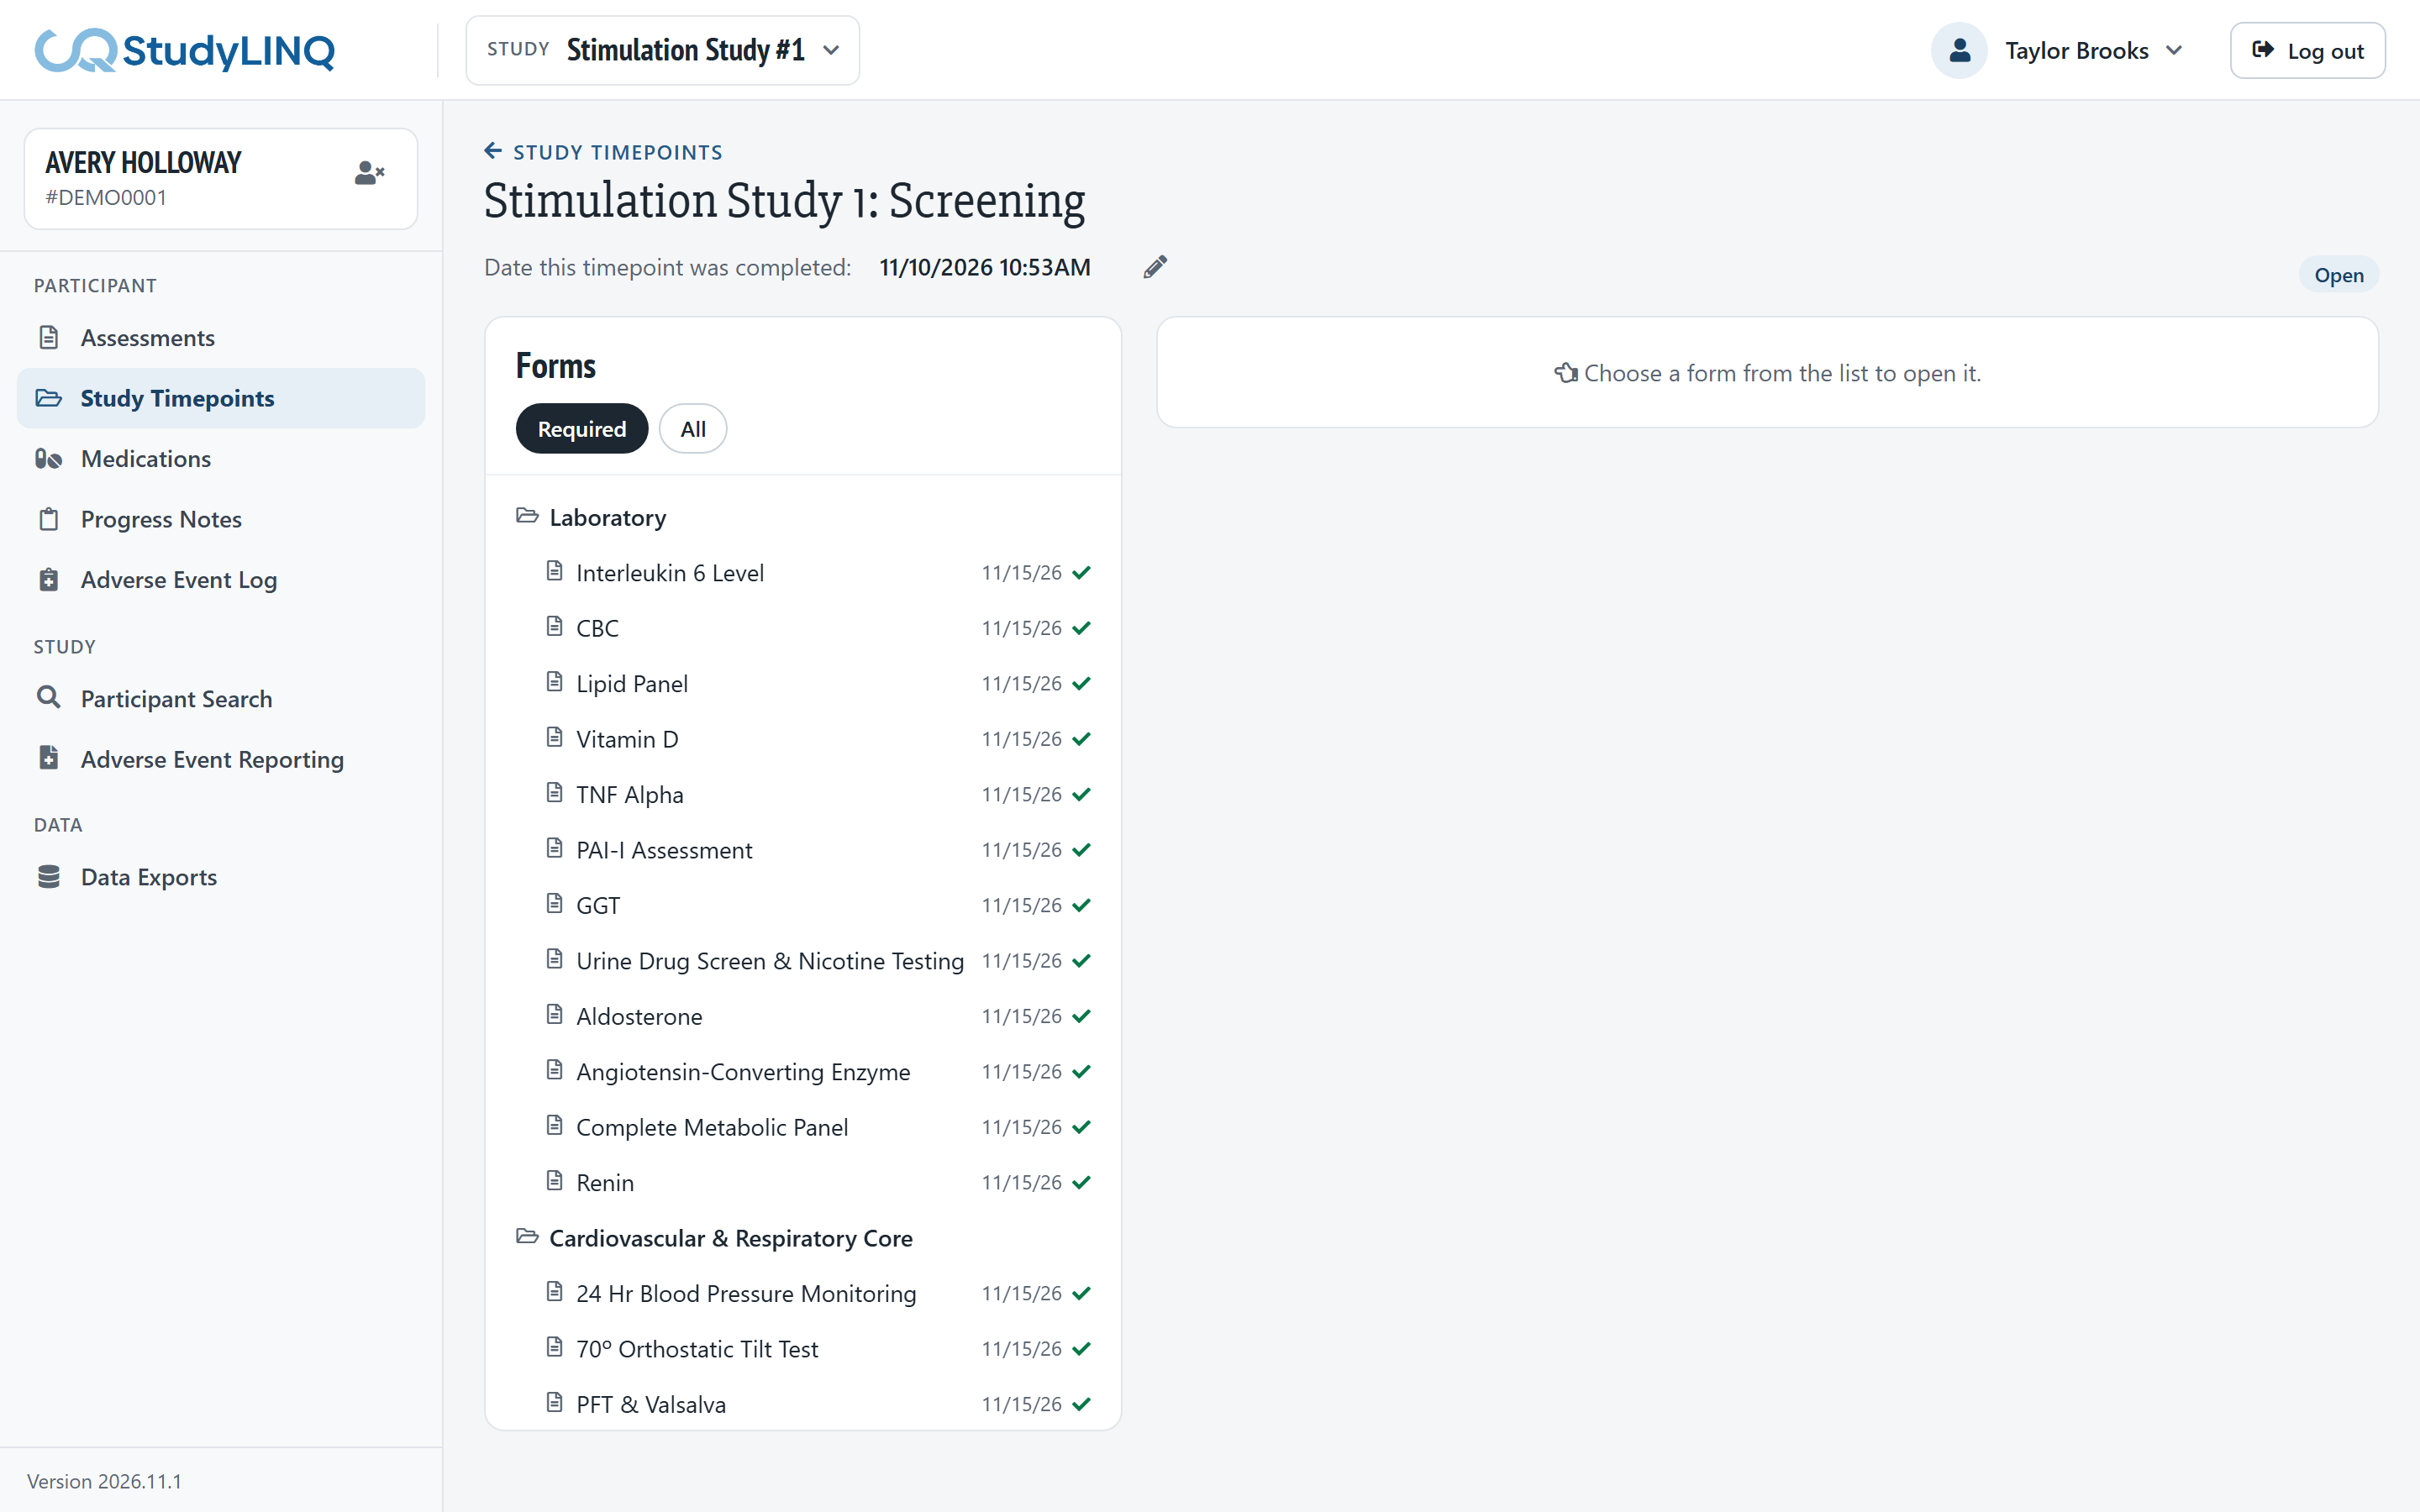
Open the timepoint. A loading message shows while the forms load.
-
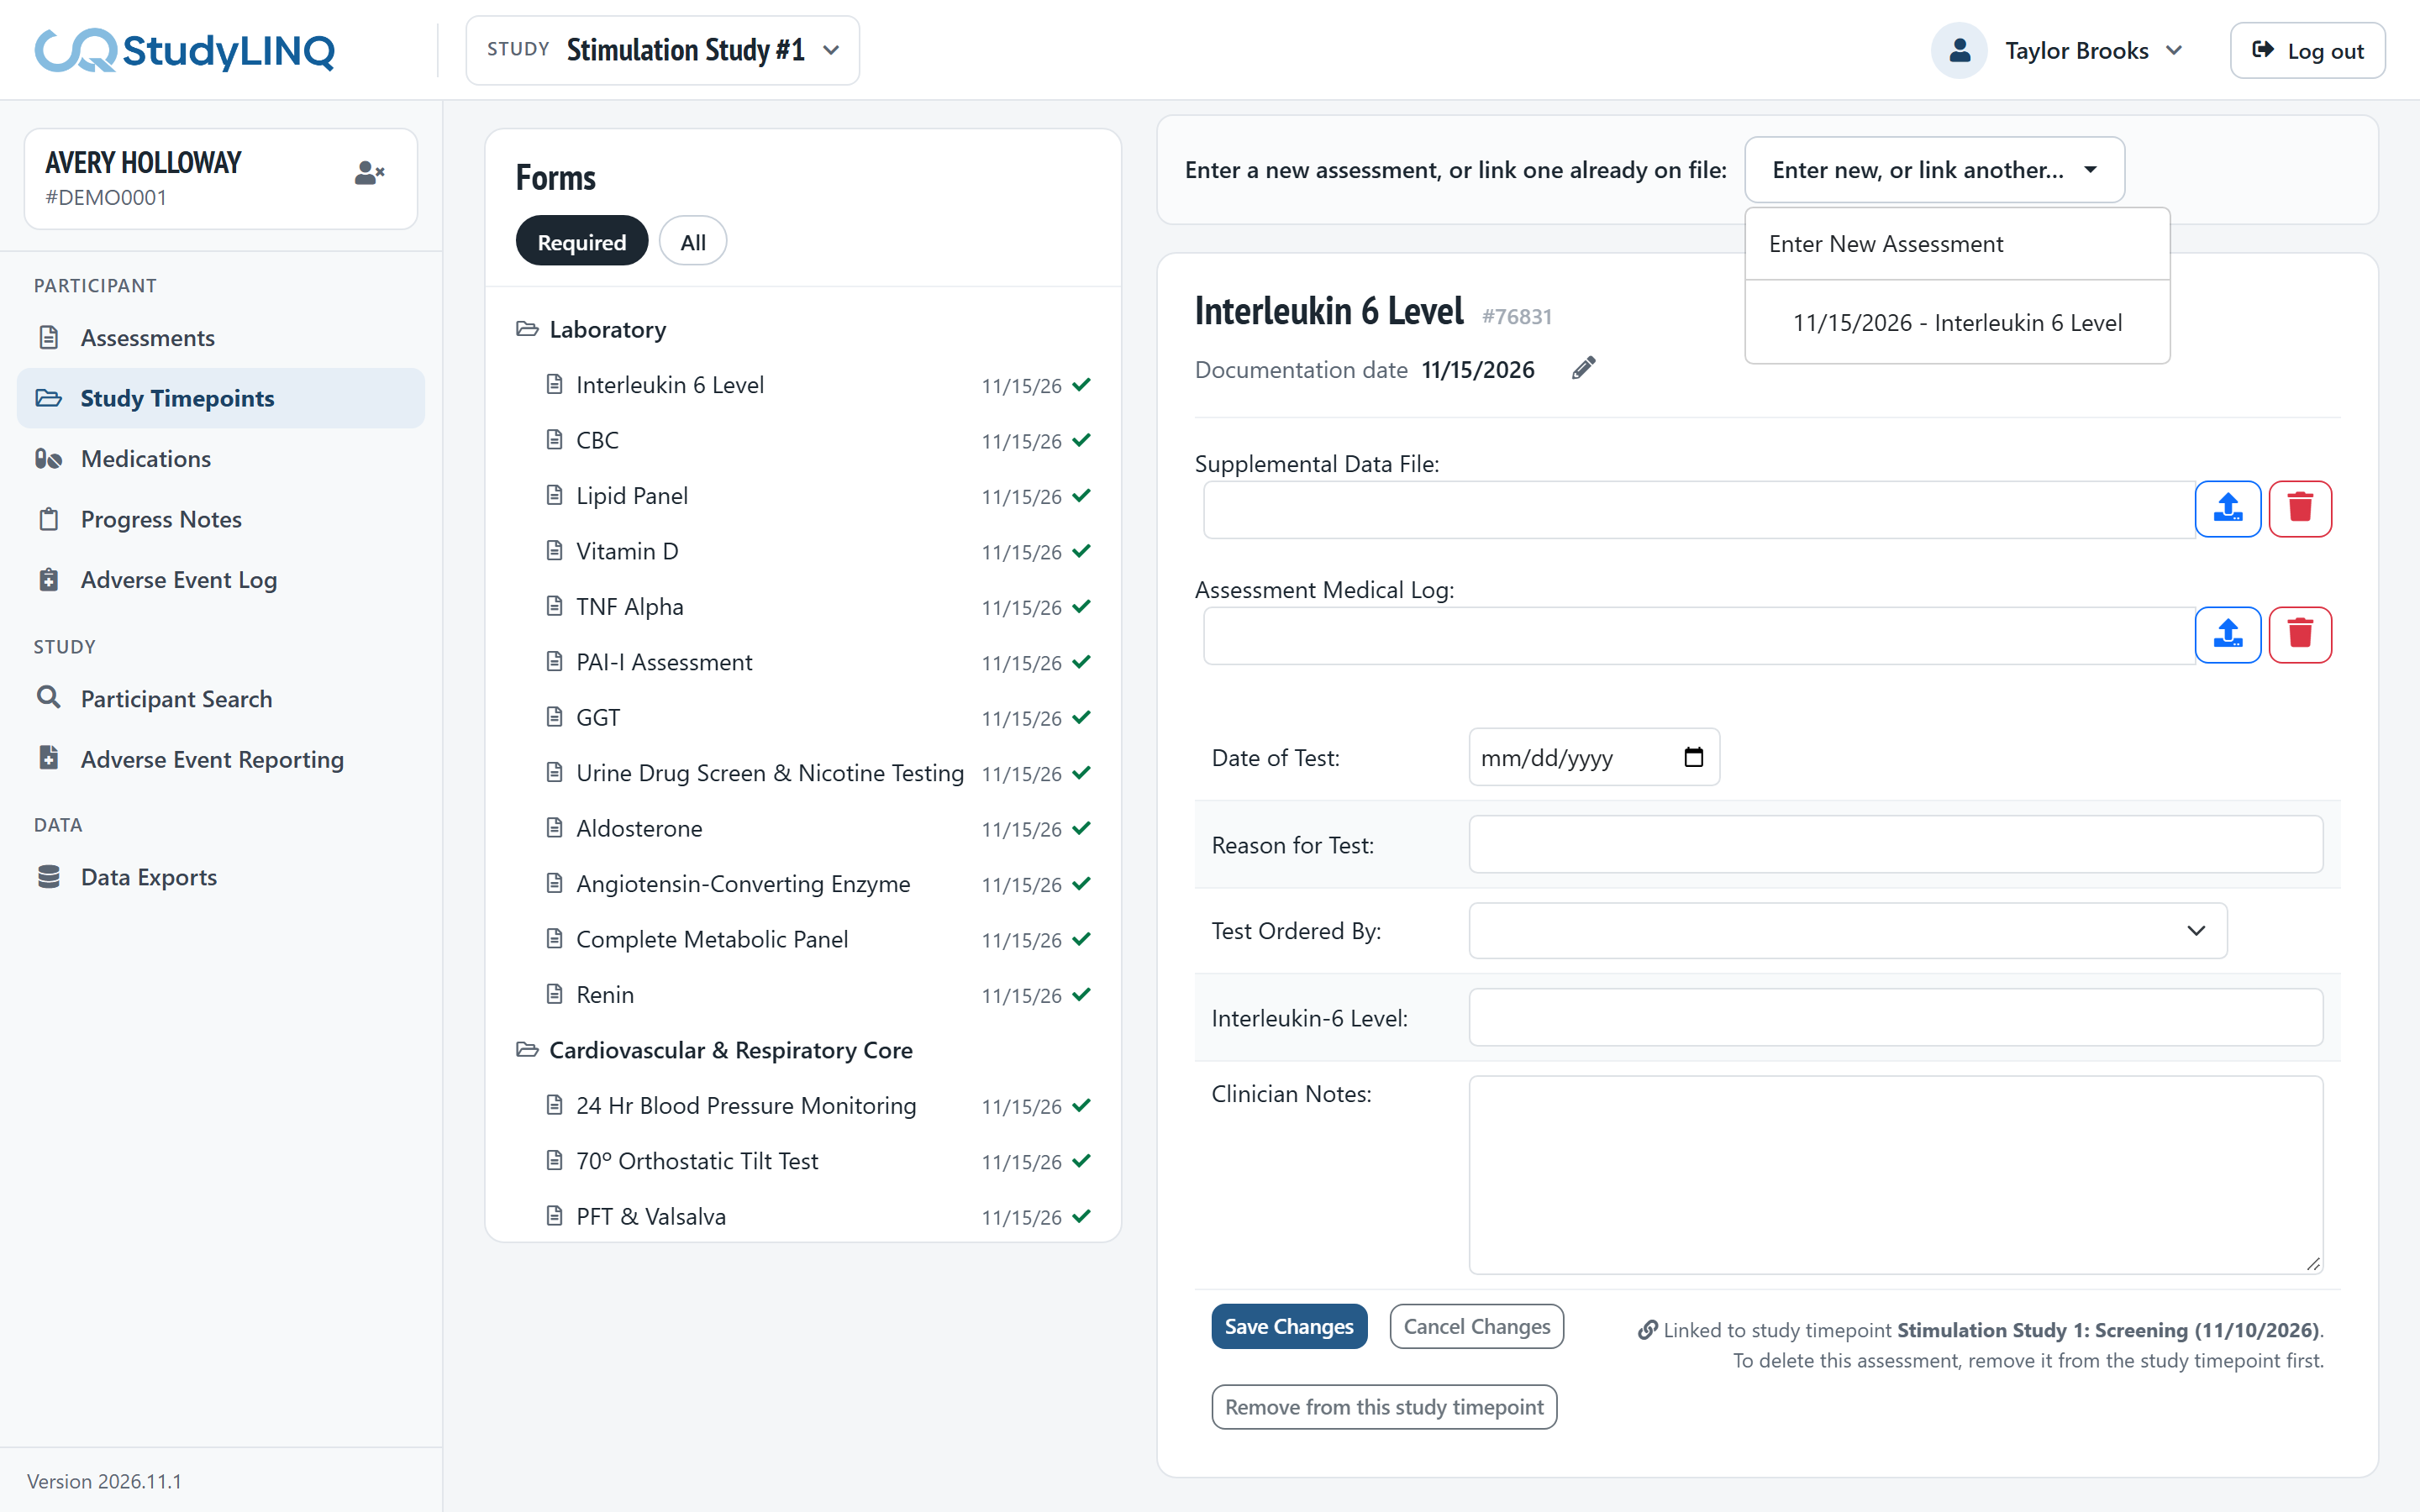
In Forms on the left, use the filters at the top to show Required forms, All forms, or another group. Each form shows when it was last documented, or Required if it still needs to be done.
-
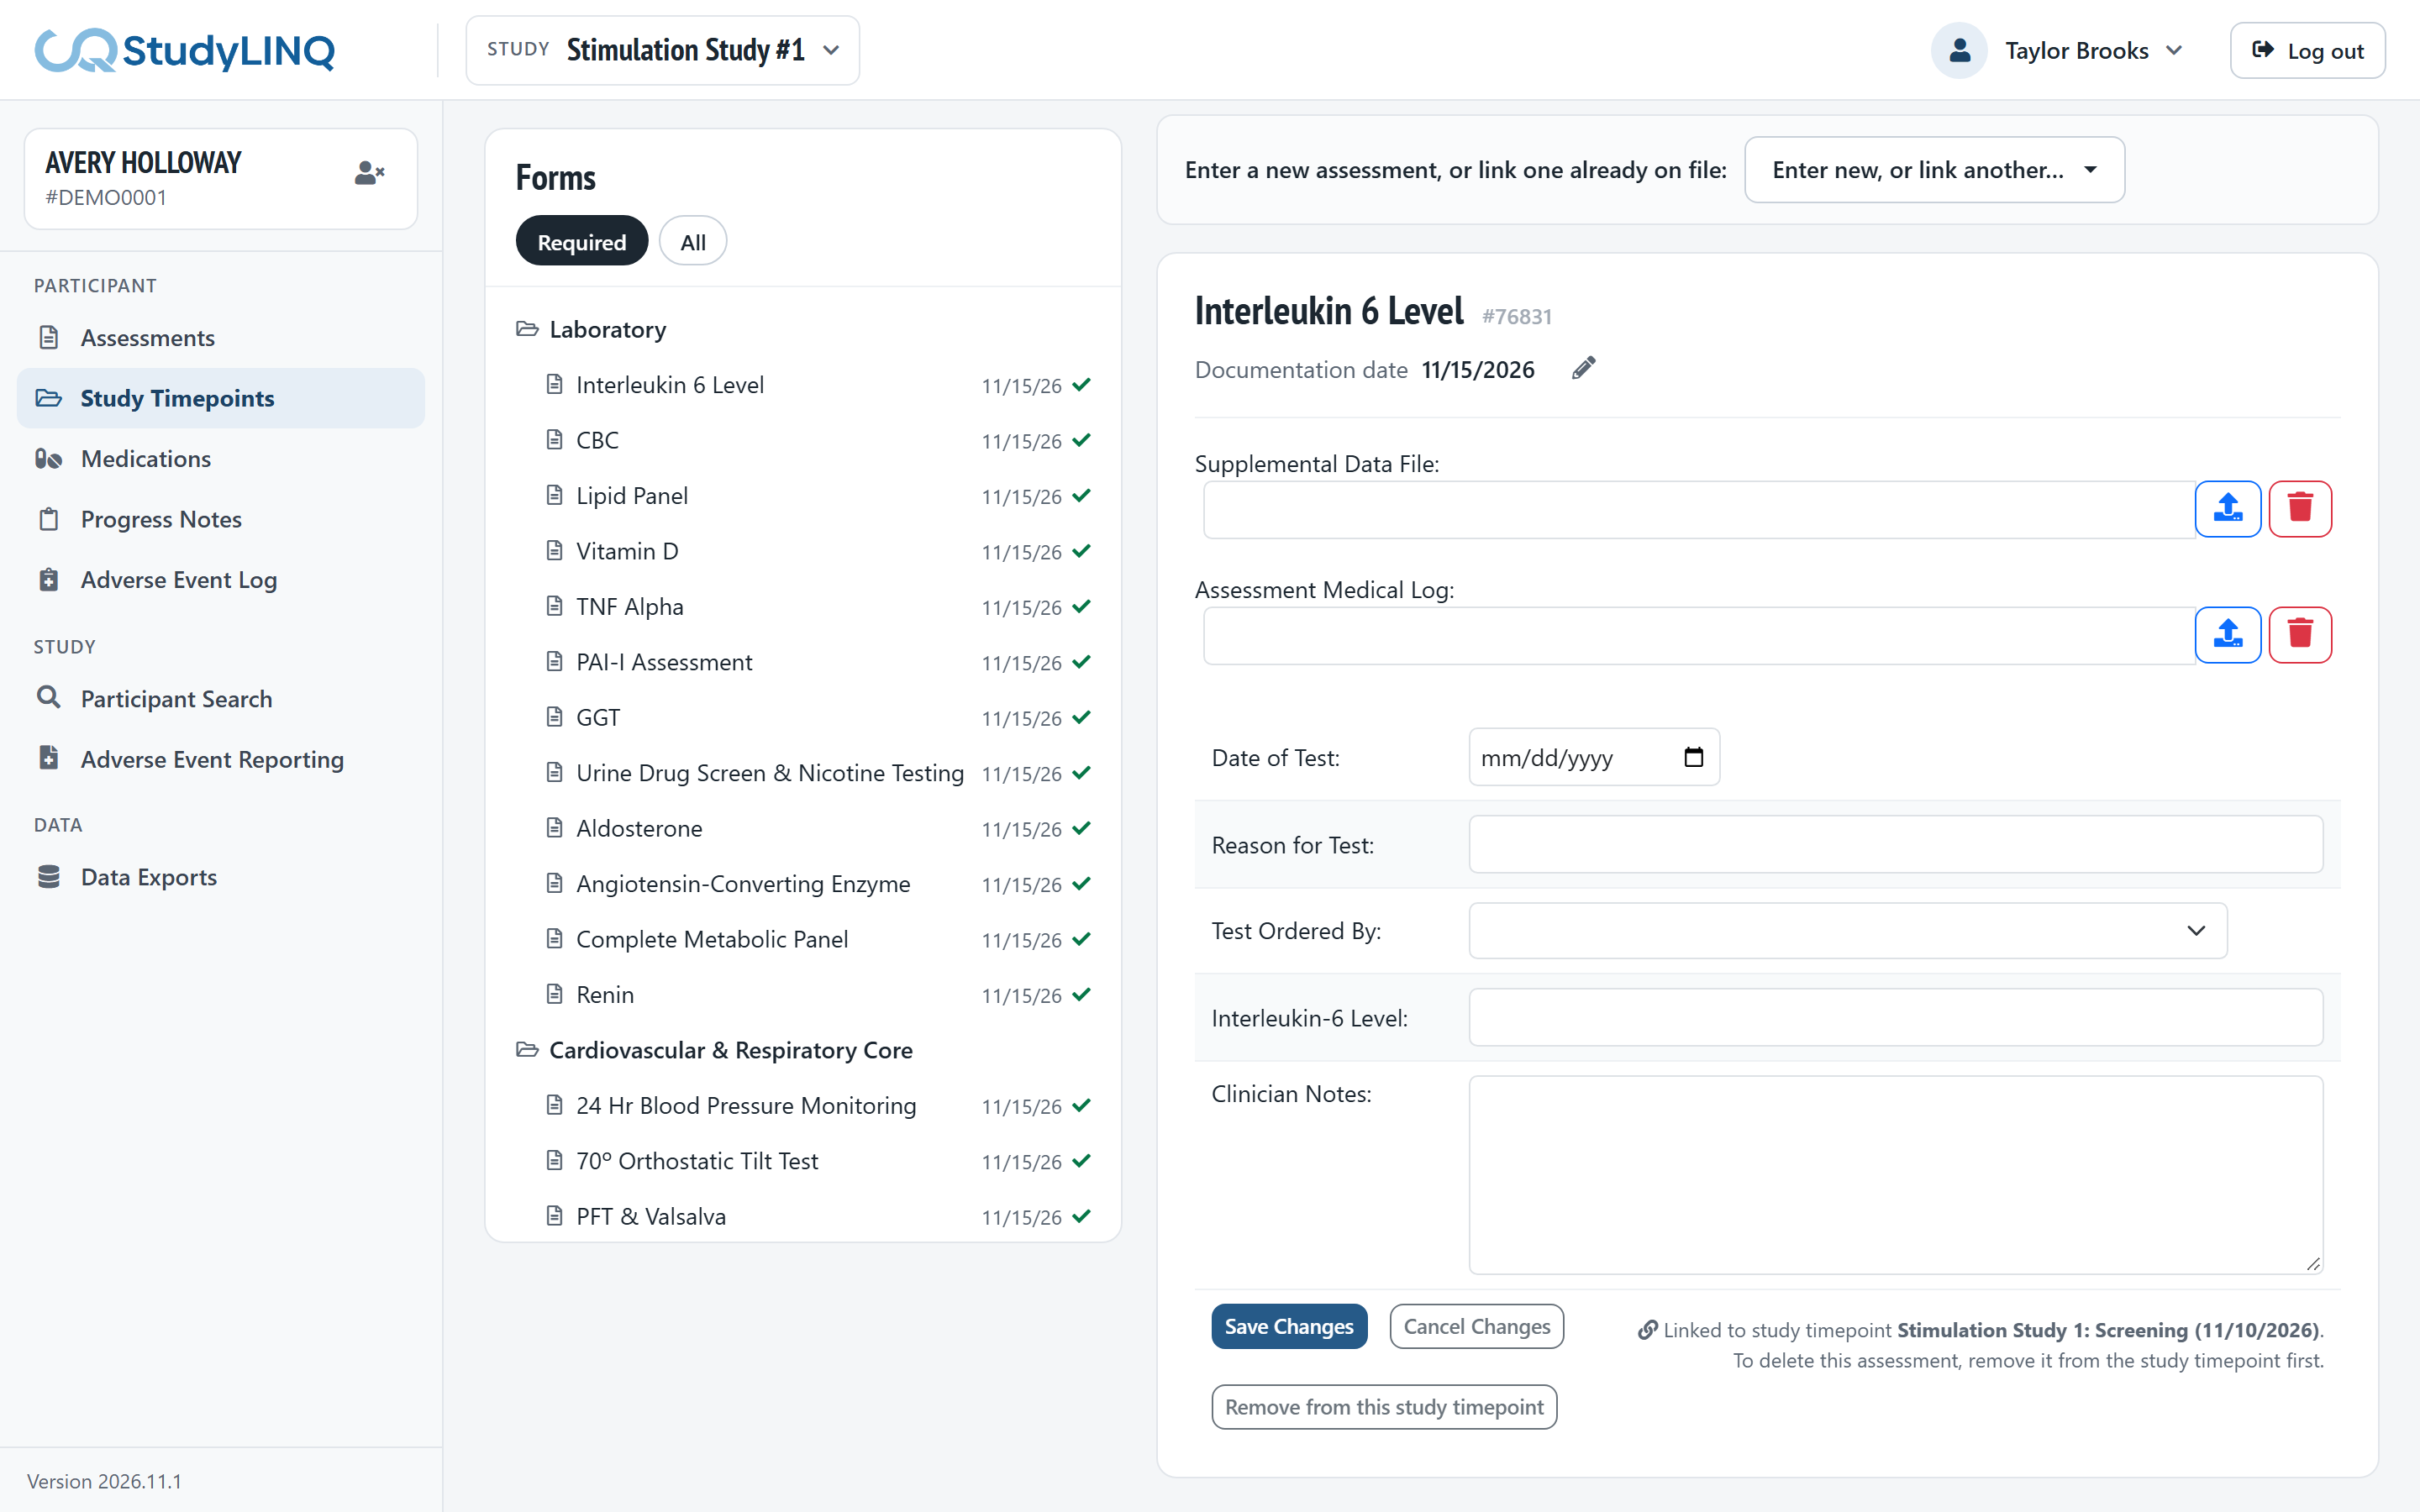
Click a form. It opens on the right; the forms list stays on the left.
-
Fill in the form and click Save Changes. The forms list updates.
-
Click the next form.
If you click another form while the open one has unsaved changes, StudyLINQ asks first. Click Discard changes to leave them, or Keep editing.
To change the timepoint's date, click the pencil next to the date at the top, choose the date and click the check mark.
Using an assessment already on file
If the participant already has a copy of the form, a list shows above the form: Enter a new assessment, or link one already on file.
-
Open the list and choose the assessment on file (by date). Or choose Enter New Assessment for a blank one.
-
For an assessment on file, check it and click Link Assessment to Collection.
If you open another form after choosing an assessment to link but before clicking Link Assessment to Collection, StudyLINQ asks first. Click Don't link it to leave it, or Go back.
When more than one assessment is linked to a form
The linked assessments show as dates above the form (the newest first). Click a date to show that assessment.
Removing an assessment from the timepoint
-
Open the form.
-
Click Remove from this study timepoint, then Remove from timepoint.
The assessment stays with the participant and can be linked again later.
Signing a study timepoint
-
Complete every required form. Until then, Sign this study timepoint is disabled and the note under it says why.
-
Click Sign this study timepoint.
-
In the Sign window, check the Signing meaning (Approval unless you choose another), and change it if it doesn't describe your signature. The meanings are the same as for signing an assessment (see Assessments > Signing an assessment).
-
Enter your password in Enter your password to sign.
-
Click Sign and close.
[Screenshot: Signing a study timepoint: signing meaning and password]
Signing signs all completed forms that aren't signed yet, with your signing meaning, and closes the timepoint. You can't change it after that. If your password doesn't match, the timepoint isn't signed and a message says so; sign again.
21 CFR Part 11: your password and signing meaning are required so each electronic signature is linked to you and states what it means (§11.50, §11.200). The meaning is stored with the signature on each form.