Adverse events move through these steps. The status button at the top of each event shows where it is, and the banner under it tells you what, if anything, you need to do.
|
Status |
Who acts |
What they do |
|---|---|---|
|
Draft |
Nurse (or physician) |
Enter the event, then send it to a physician |
|
Pending Physician Review |
Physician |
Review, sign, and send it to the medical monitor or the P.I. |
|
Pending Review |
Medical monitor (or a requested reviewer) |
Sign, request additional changes, or request an additional review |
|
Pending PI Review |
Principal investigator |
Sign, request additional changes, or request an additional review |
|
Additional Changes Needed |
Site (nurse or physician) |
Make the requested changes and send it on again |
|
Signed |
— |
Complete. Reports and responses can still be added. |
If the study has no medical monitor, the physician sends the event straight to the P.I., and the medical monitor step shows Not needed – This study has no medical monitor.
Opening an adverse event
-
From the participant: load the participant, click Adverse Event Log in the side menu, then click the event.
-
From the dashboard: click Adverse Event Dashboard, then Open on the event (see Adverse Event Dashboard and Reporting).
-
From an email: click the link in the email. You must have access to the event's study.
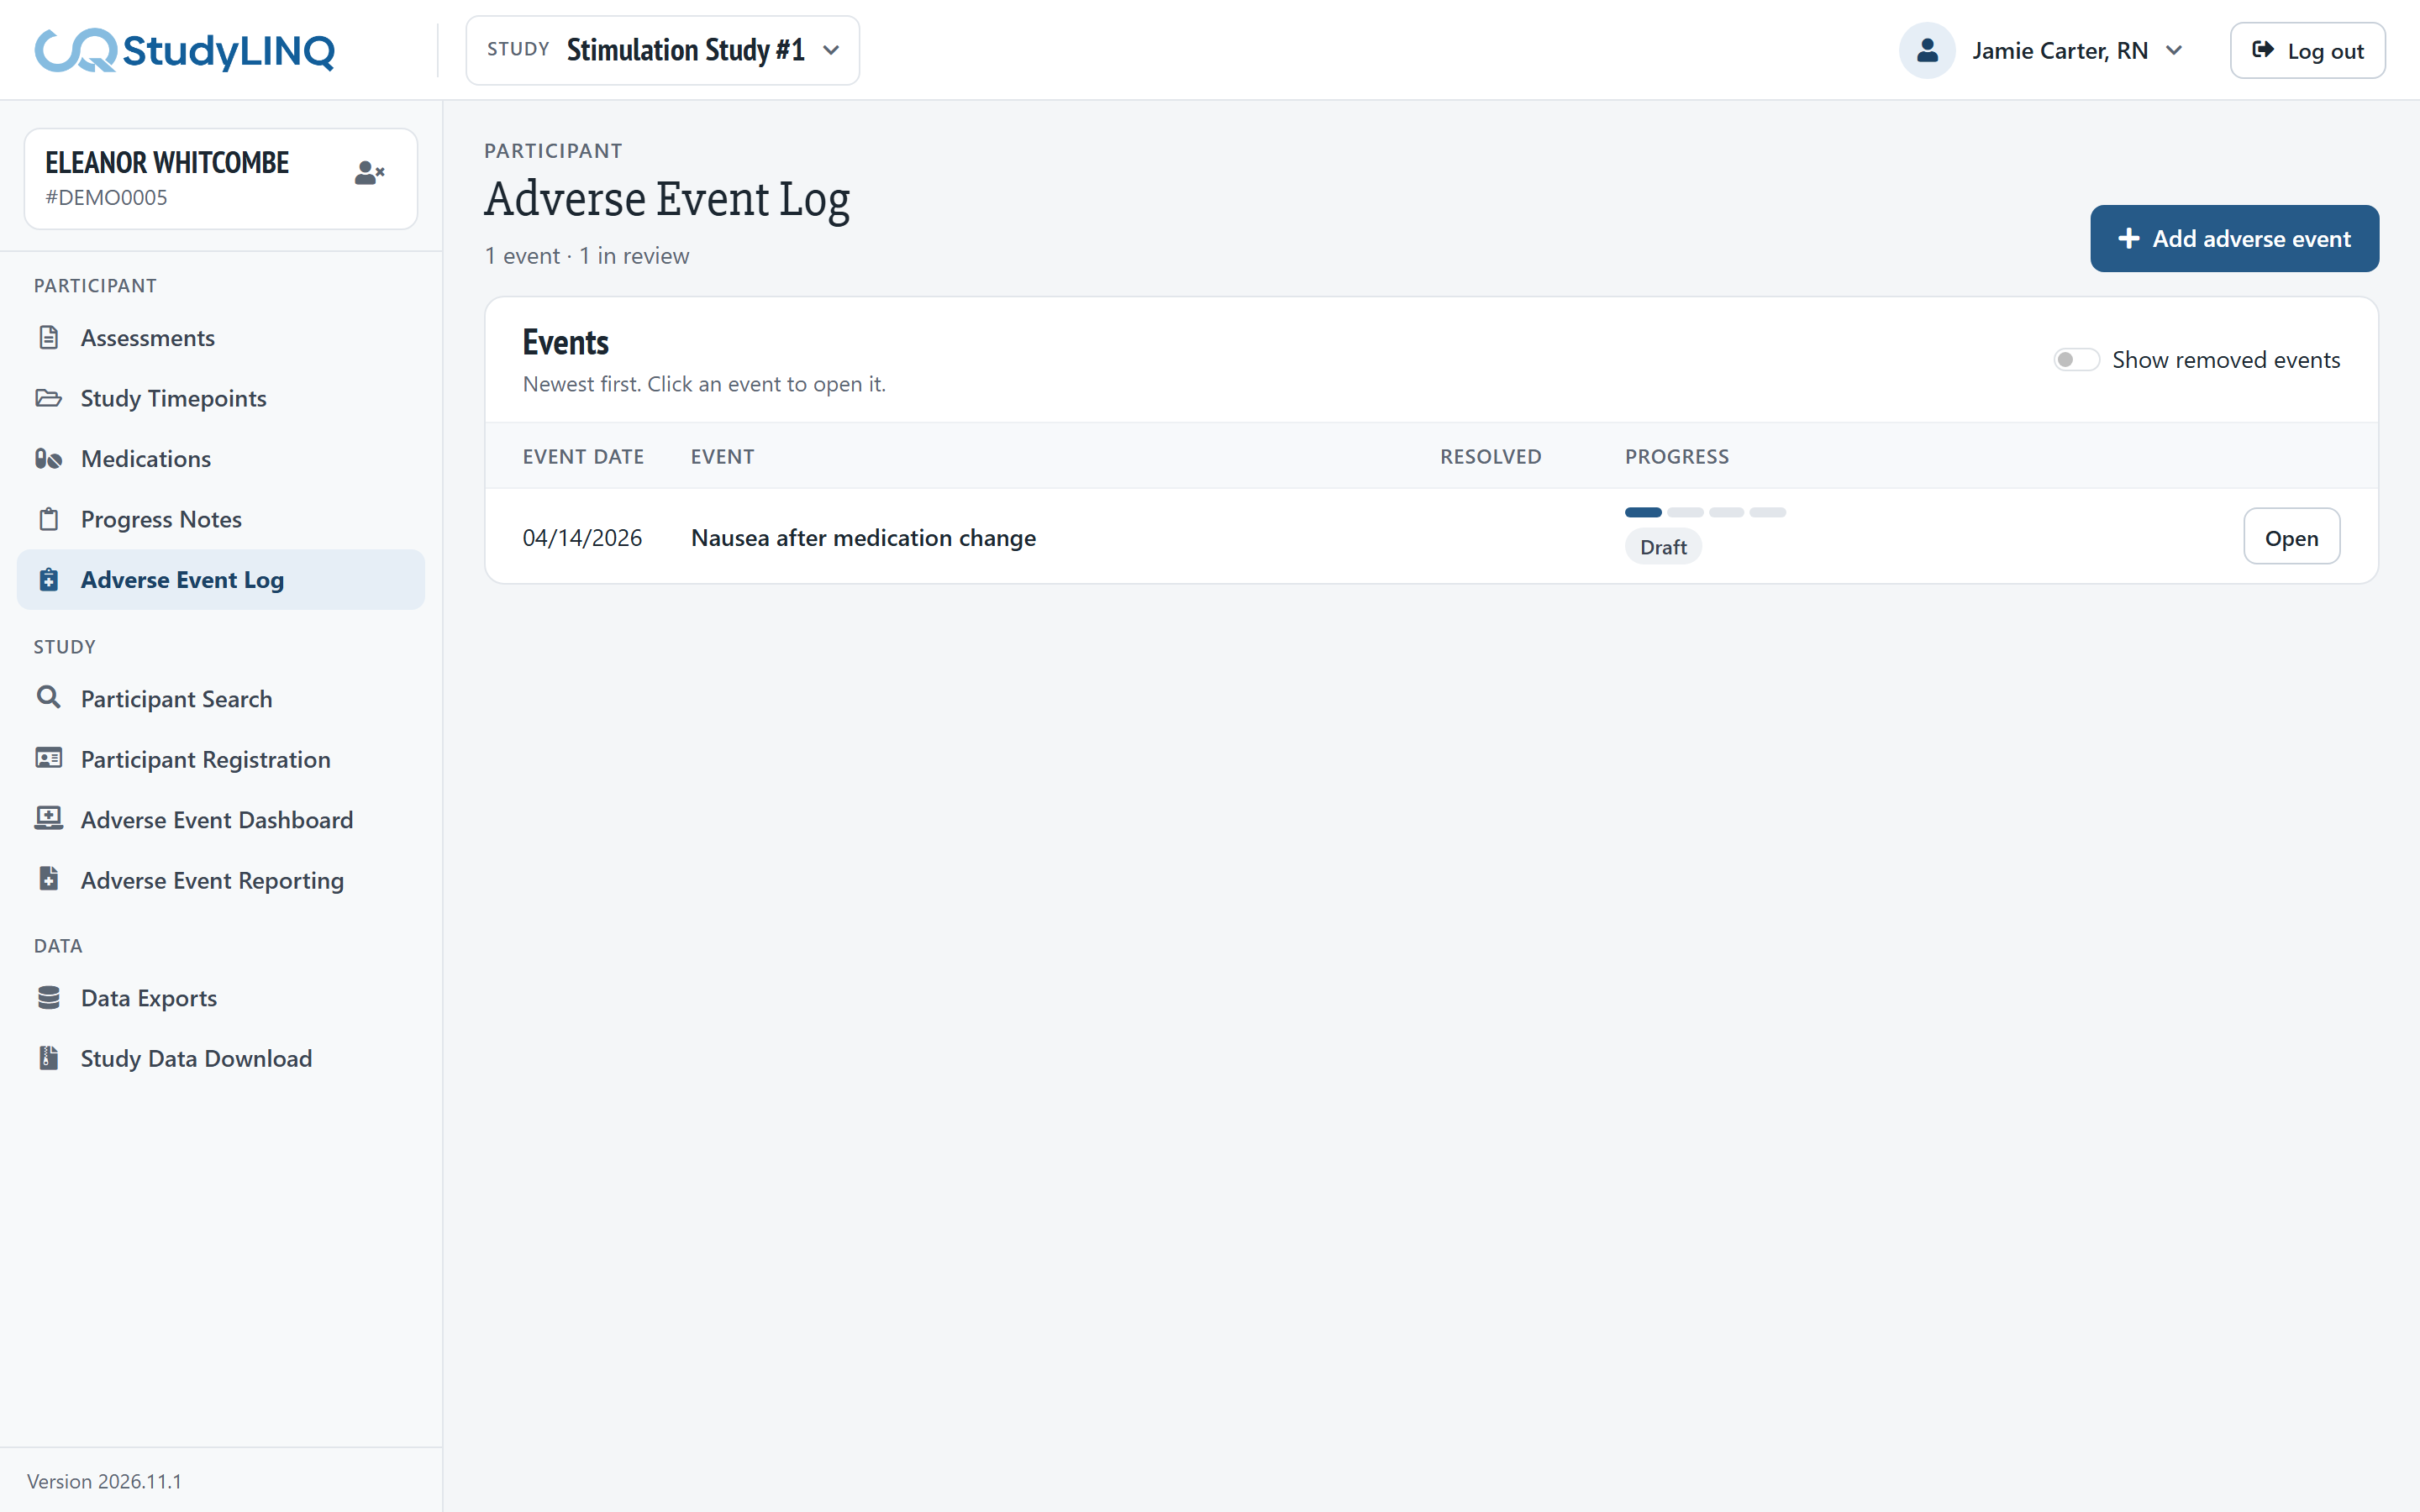
In the Adverse Event Log, events are listed newest first. Progress shows each event's step. Turn on Show removed events to include removed events.
Entering an adverse event
-
Load the participant and open the Adverse Event Log.
-
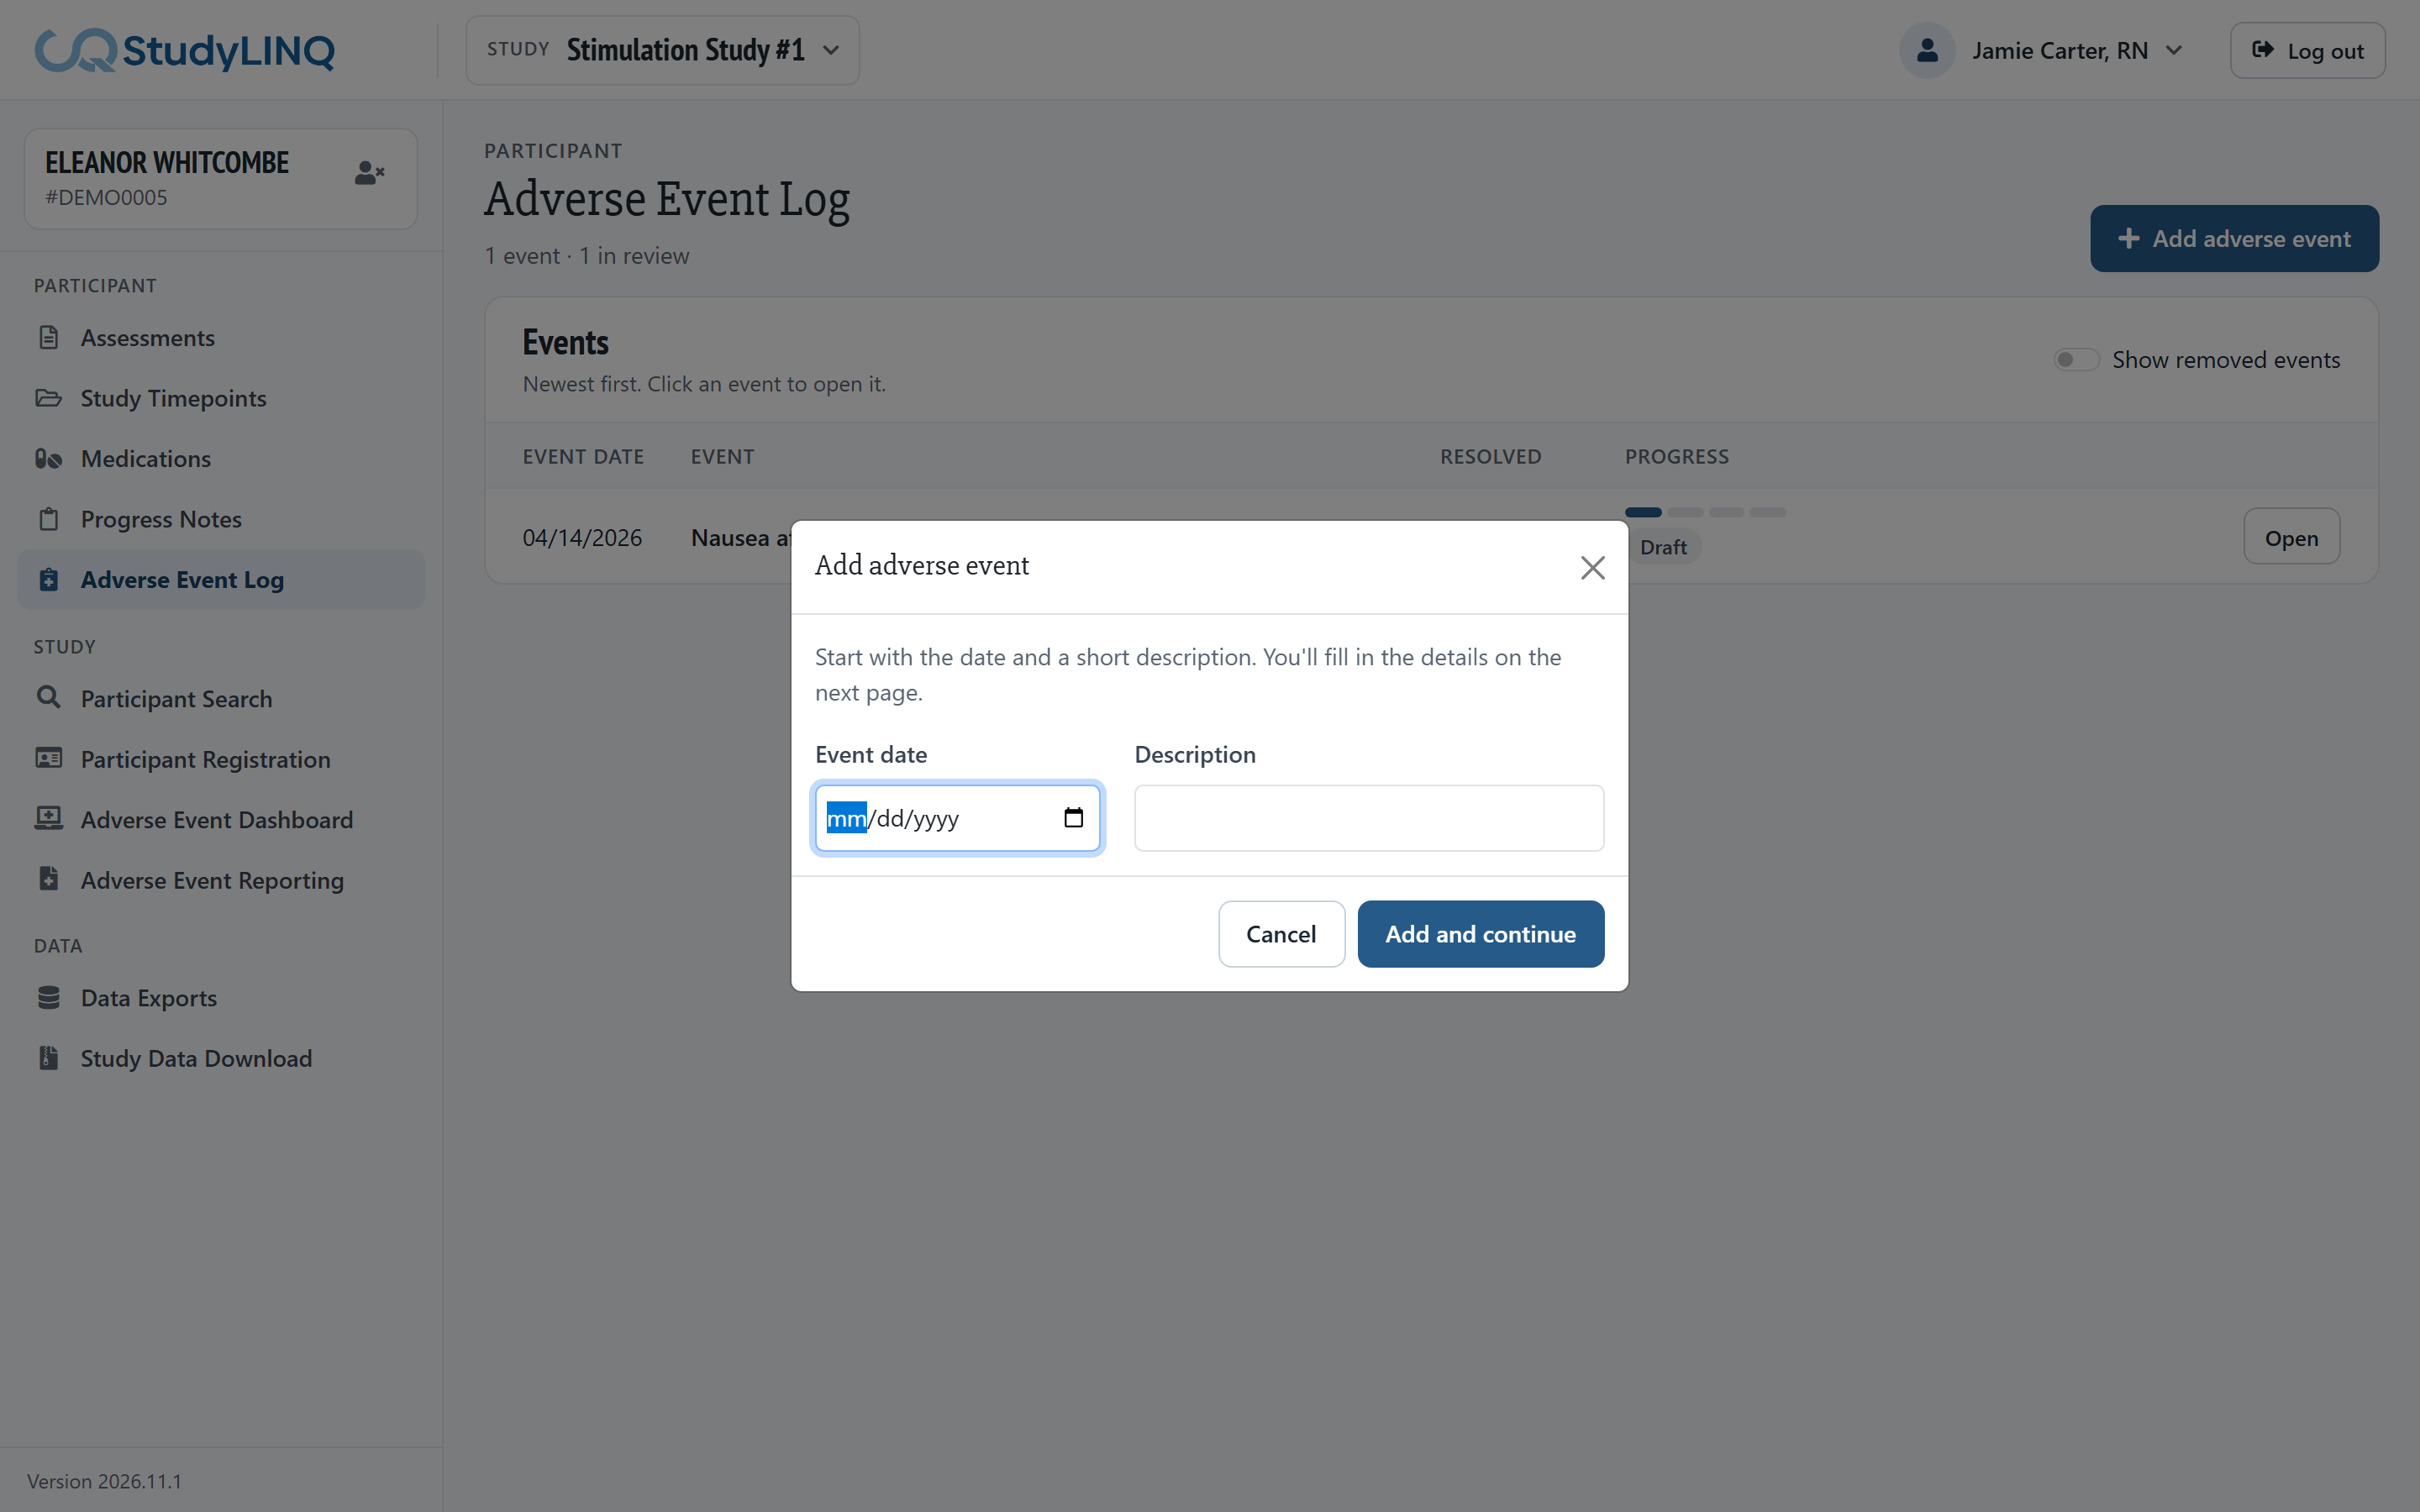
Click Add adverse event.
-
Enter the Event date and a short Description, then click Add and continue. The new event opens as a draft.
-
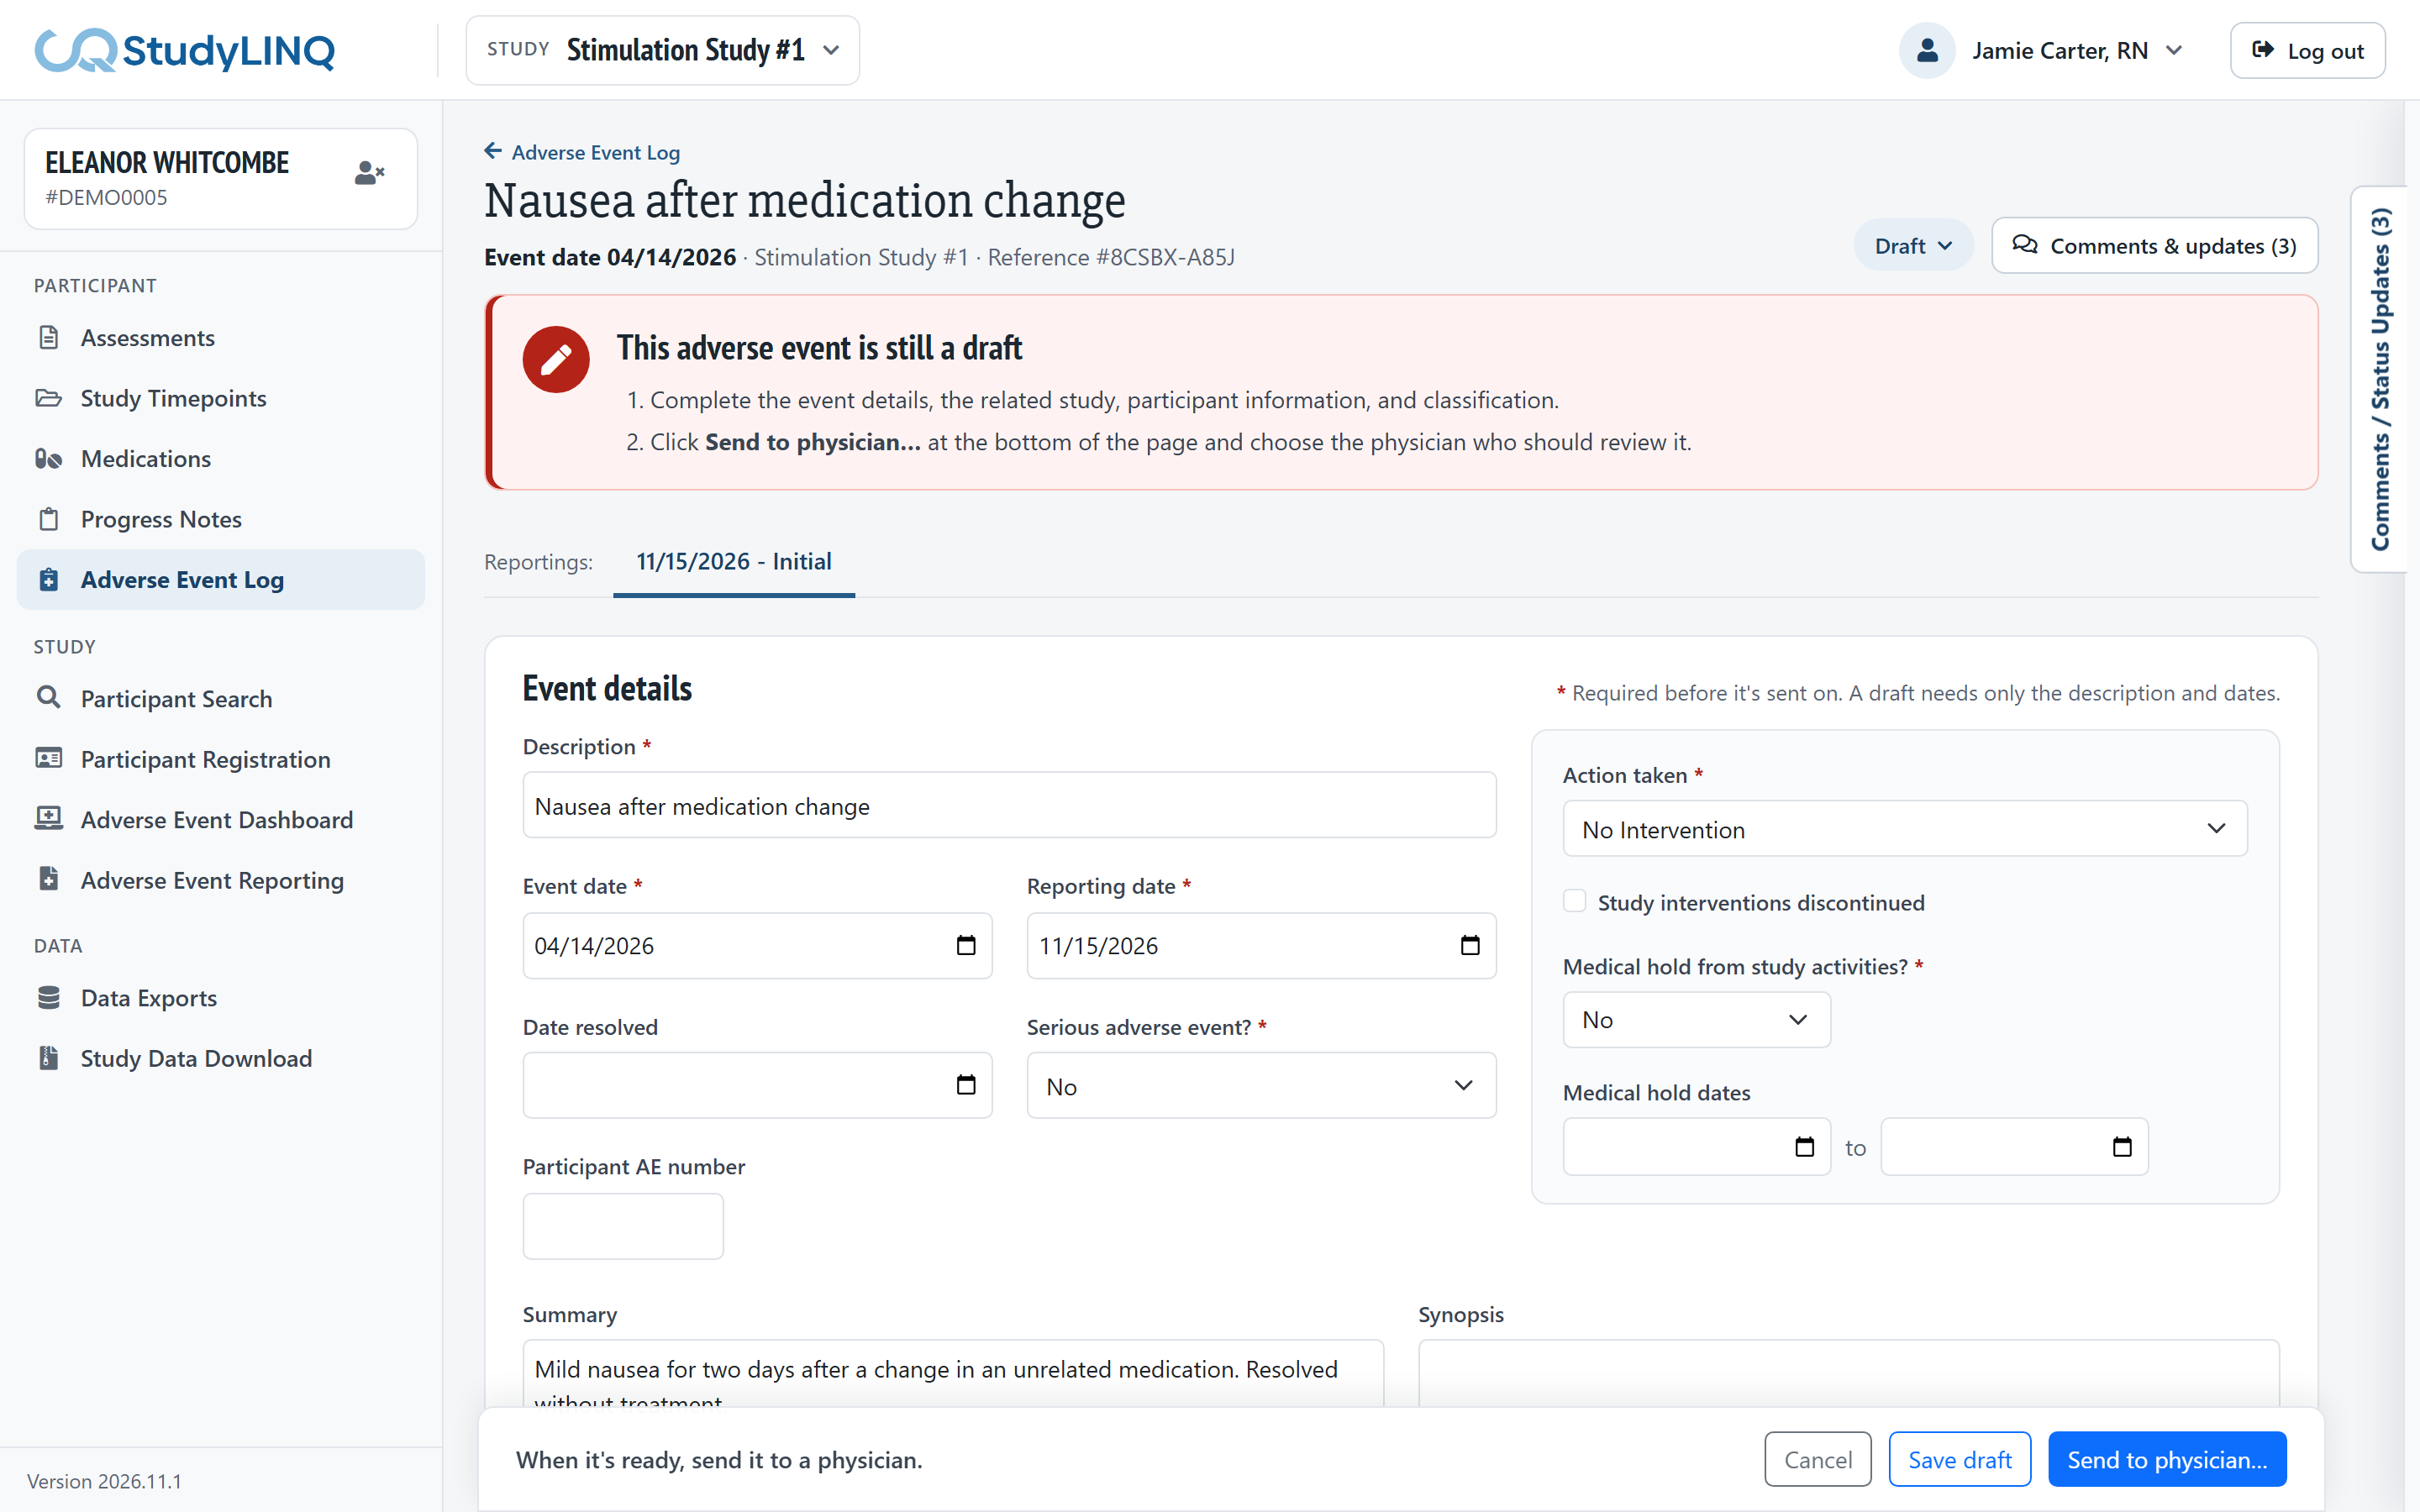
Complete Event details: Description, Event date, Reporting date, Date resolved, Serious adverse event?, Participant AE number, Action taken, Study interventions discontinued, Summary and Synopsis. Fields marked * are required before the event is sent on.
-
If the participant must stop study activities, set Medical hold from study activities? and enter the Medical hold begin date (and end date when it ends).
-
Under Related to study, tick the study, then complete Study relatedness, Expected, Seriousness, Severity, Site and Primary PI.
-
Under Participant information, add the participant's stimulation status in Add a stimulation. View full implant history shows their devices.
-
Under Classification (CTCAE), choose the CTCAE system, CTCAE term and CTCAE grade. If StudyLINQ suggests a classification used for similar events, click Apply to use it.
-
Under Required reporting bodies, add each body the event must be reported to.
-
Attach any documents (see Attaching files).
-
Click Save draft to keep working later, or send it to a physician (below).
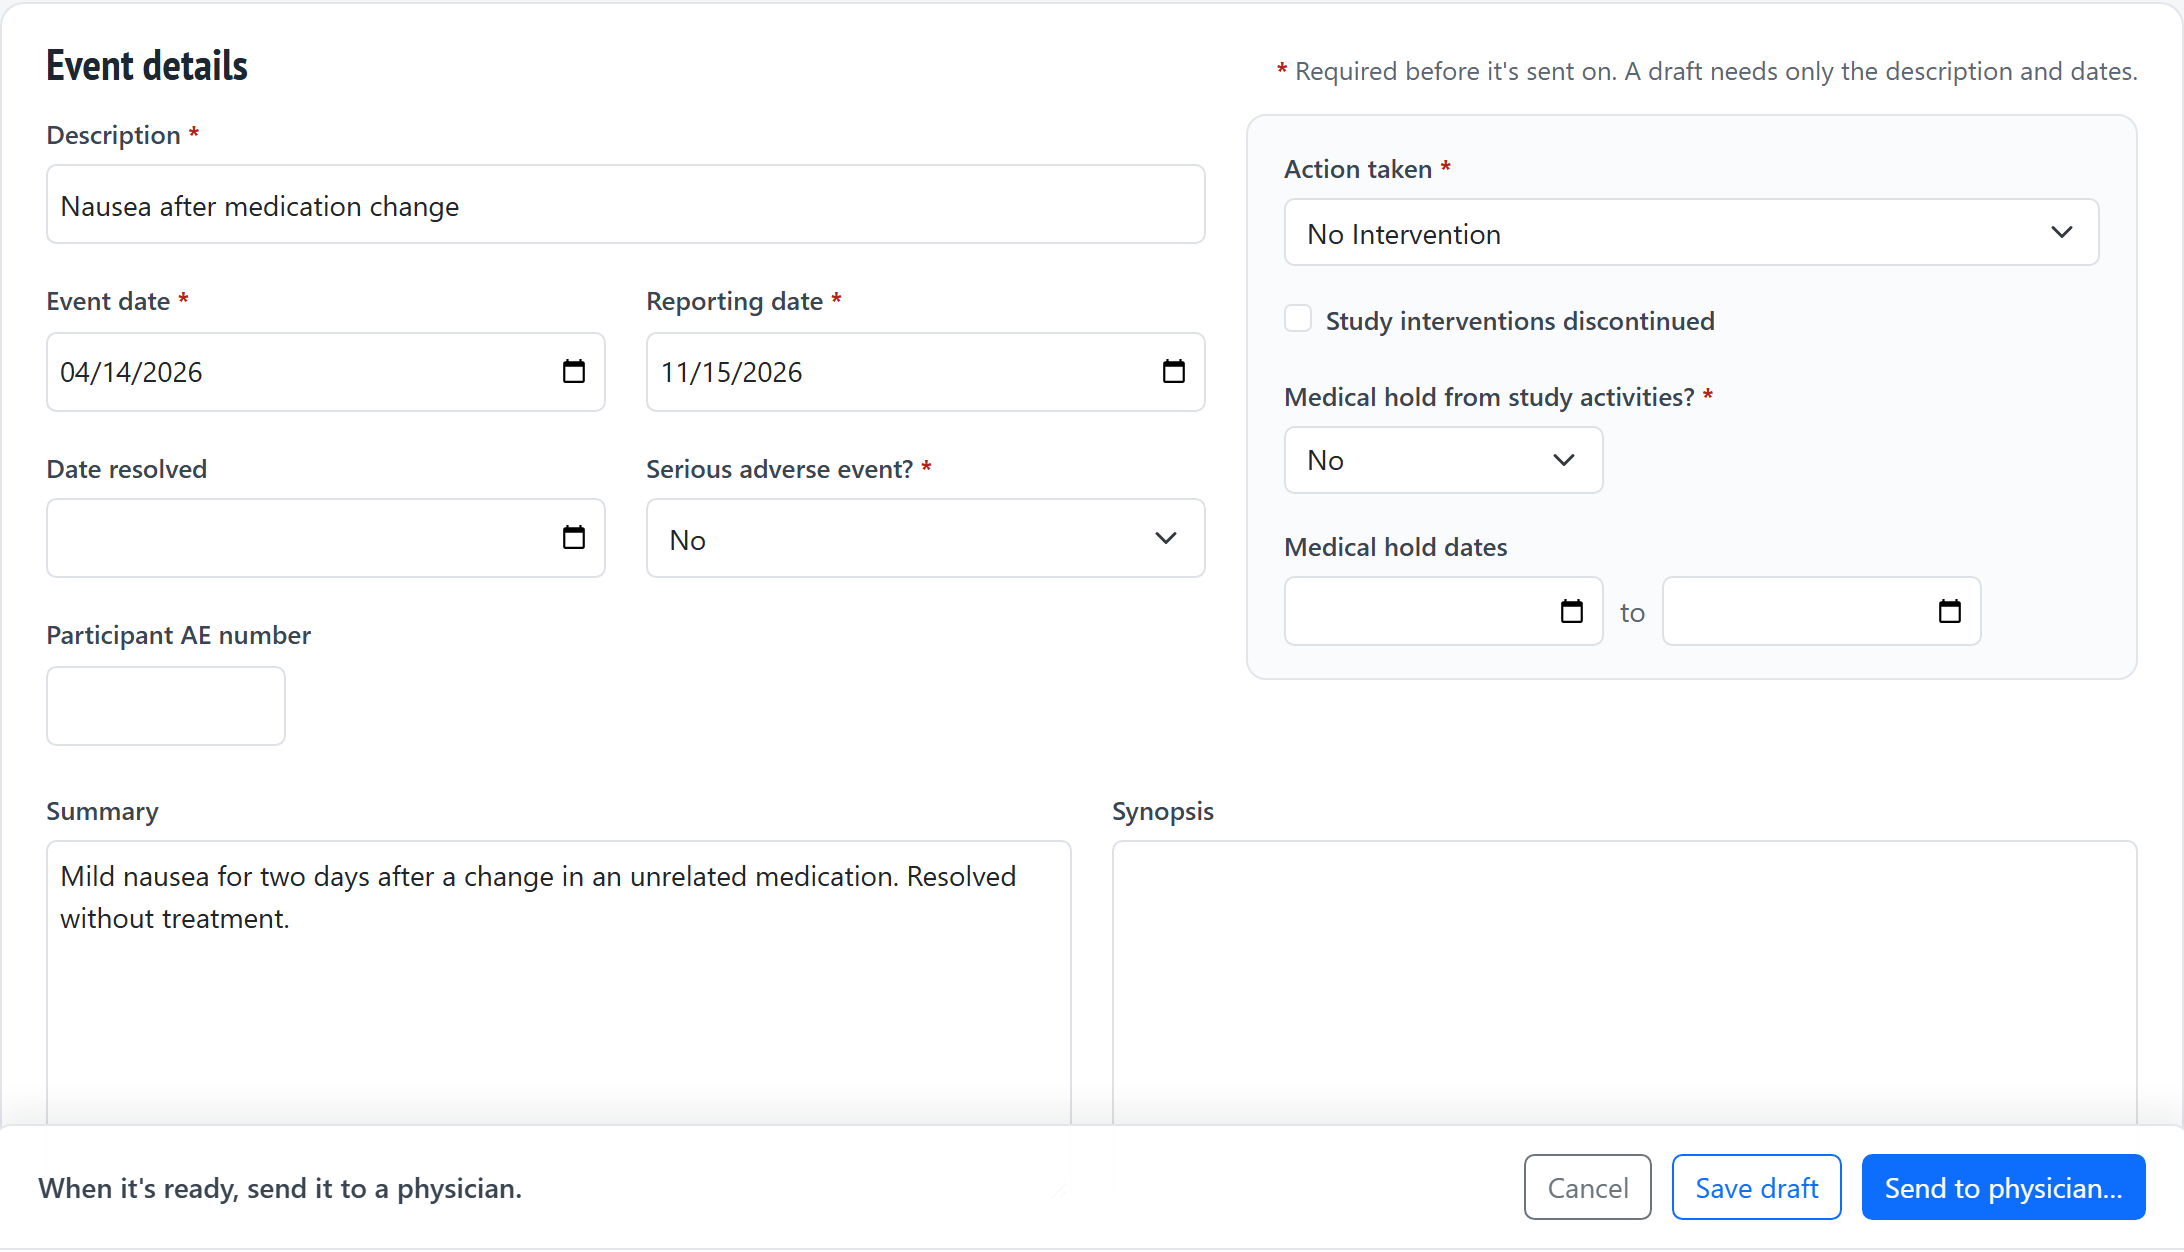
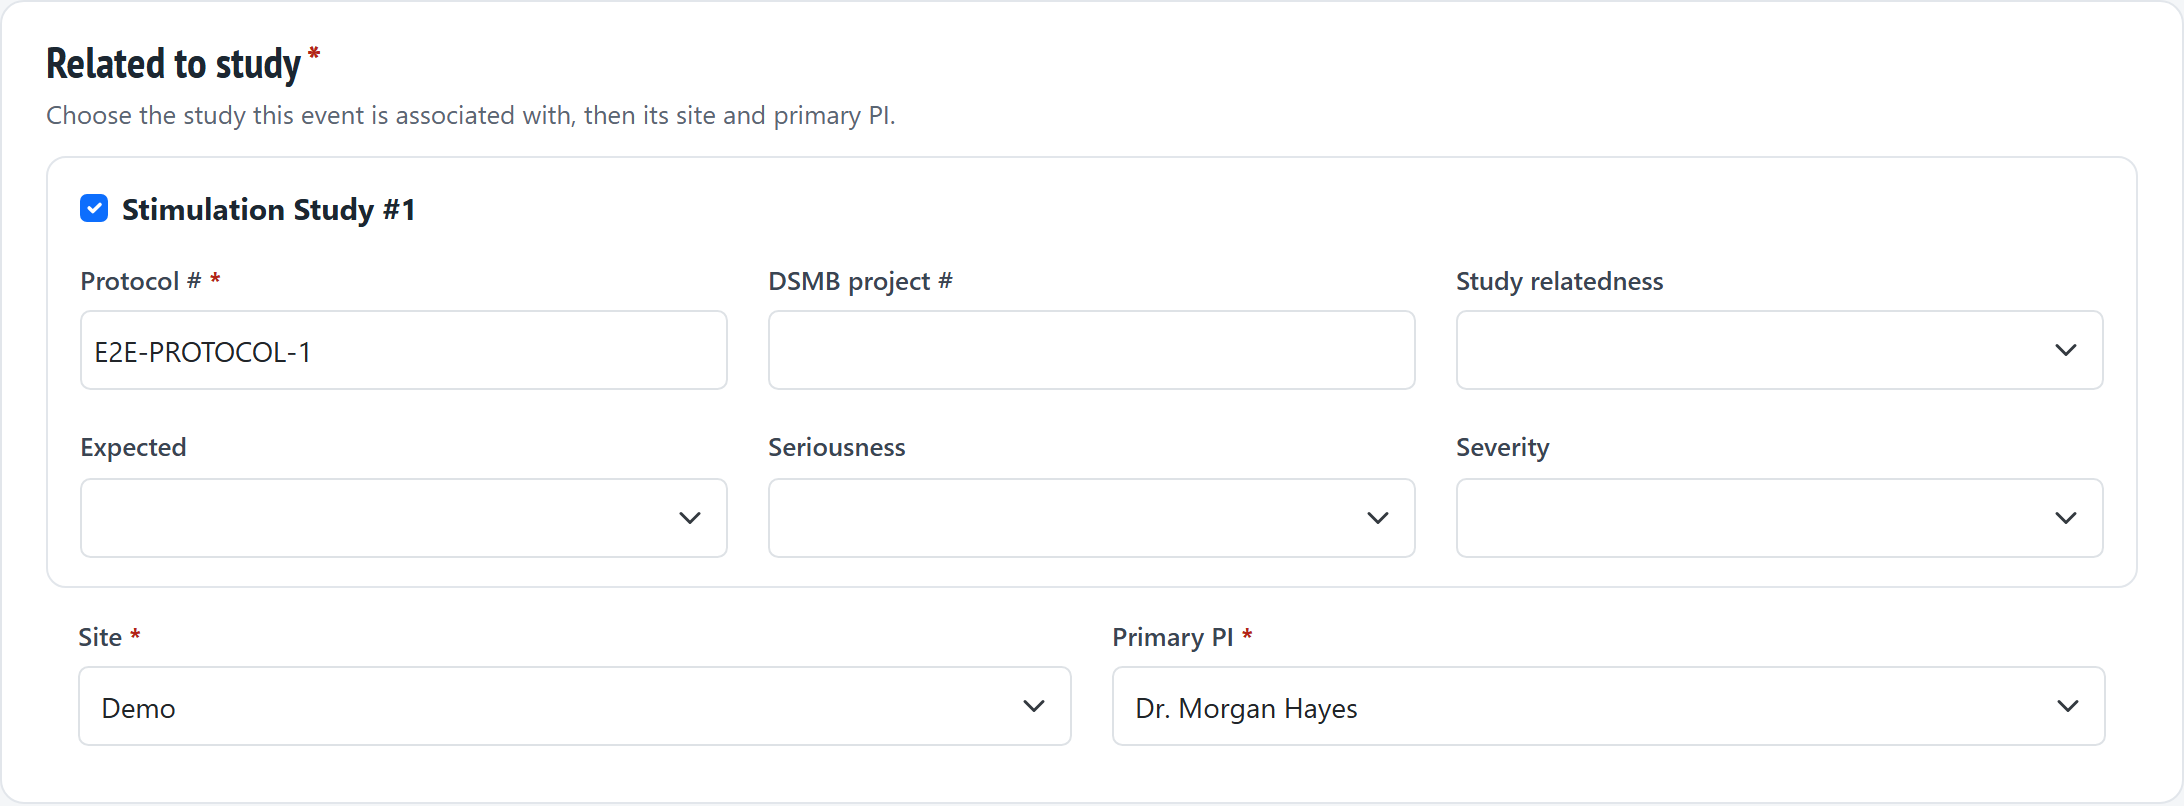
Saving… shows while the event saves. Keep the page open until it closes; you then return to where you came from.
Sending an event to a physician
For nurses.
-
Open the draft and check that the required fields are complete and the study is ticked.
-
Click Send to physician….
-
Choose the physician in Select Physician and add Comments if you like.
-
Click Send to Physician. The physician gets an email.
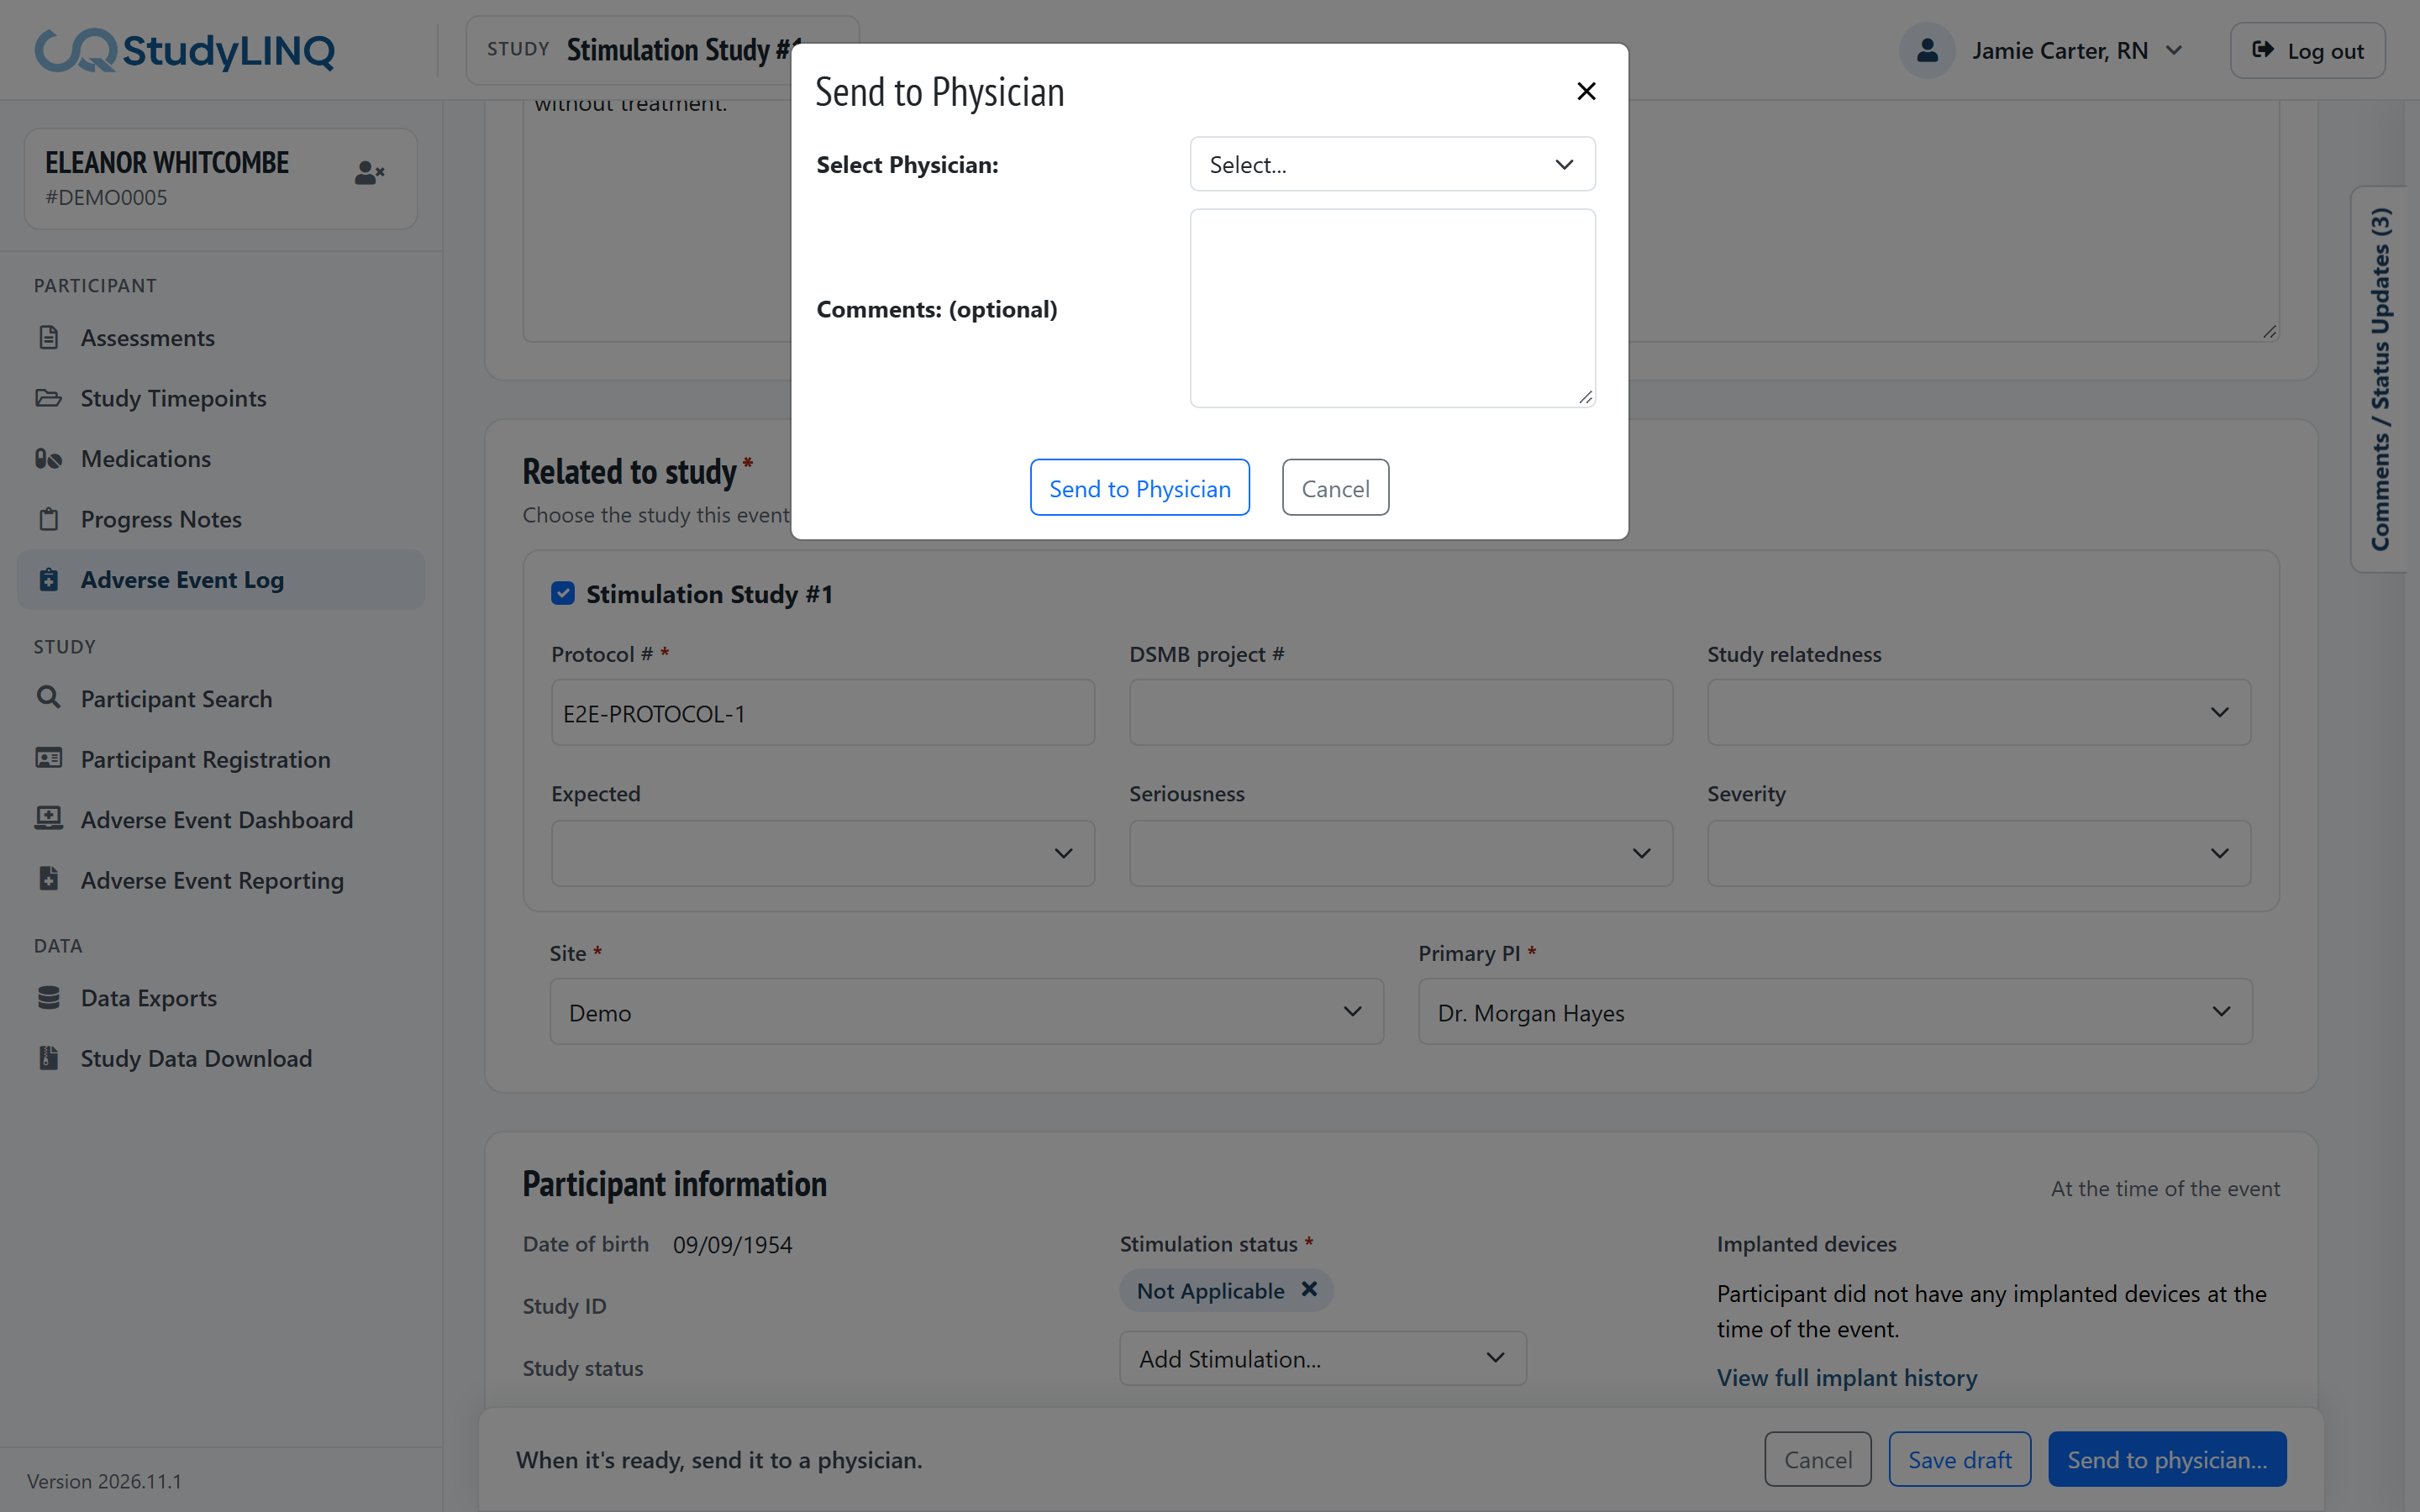
If something required is missing, a message lists what to complete first.
After it is sent you can still correct the event: open it, make the change and click Save changes.
Physician review
-
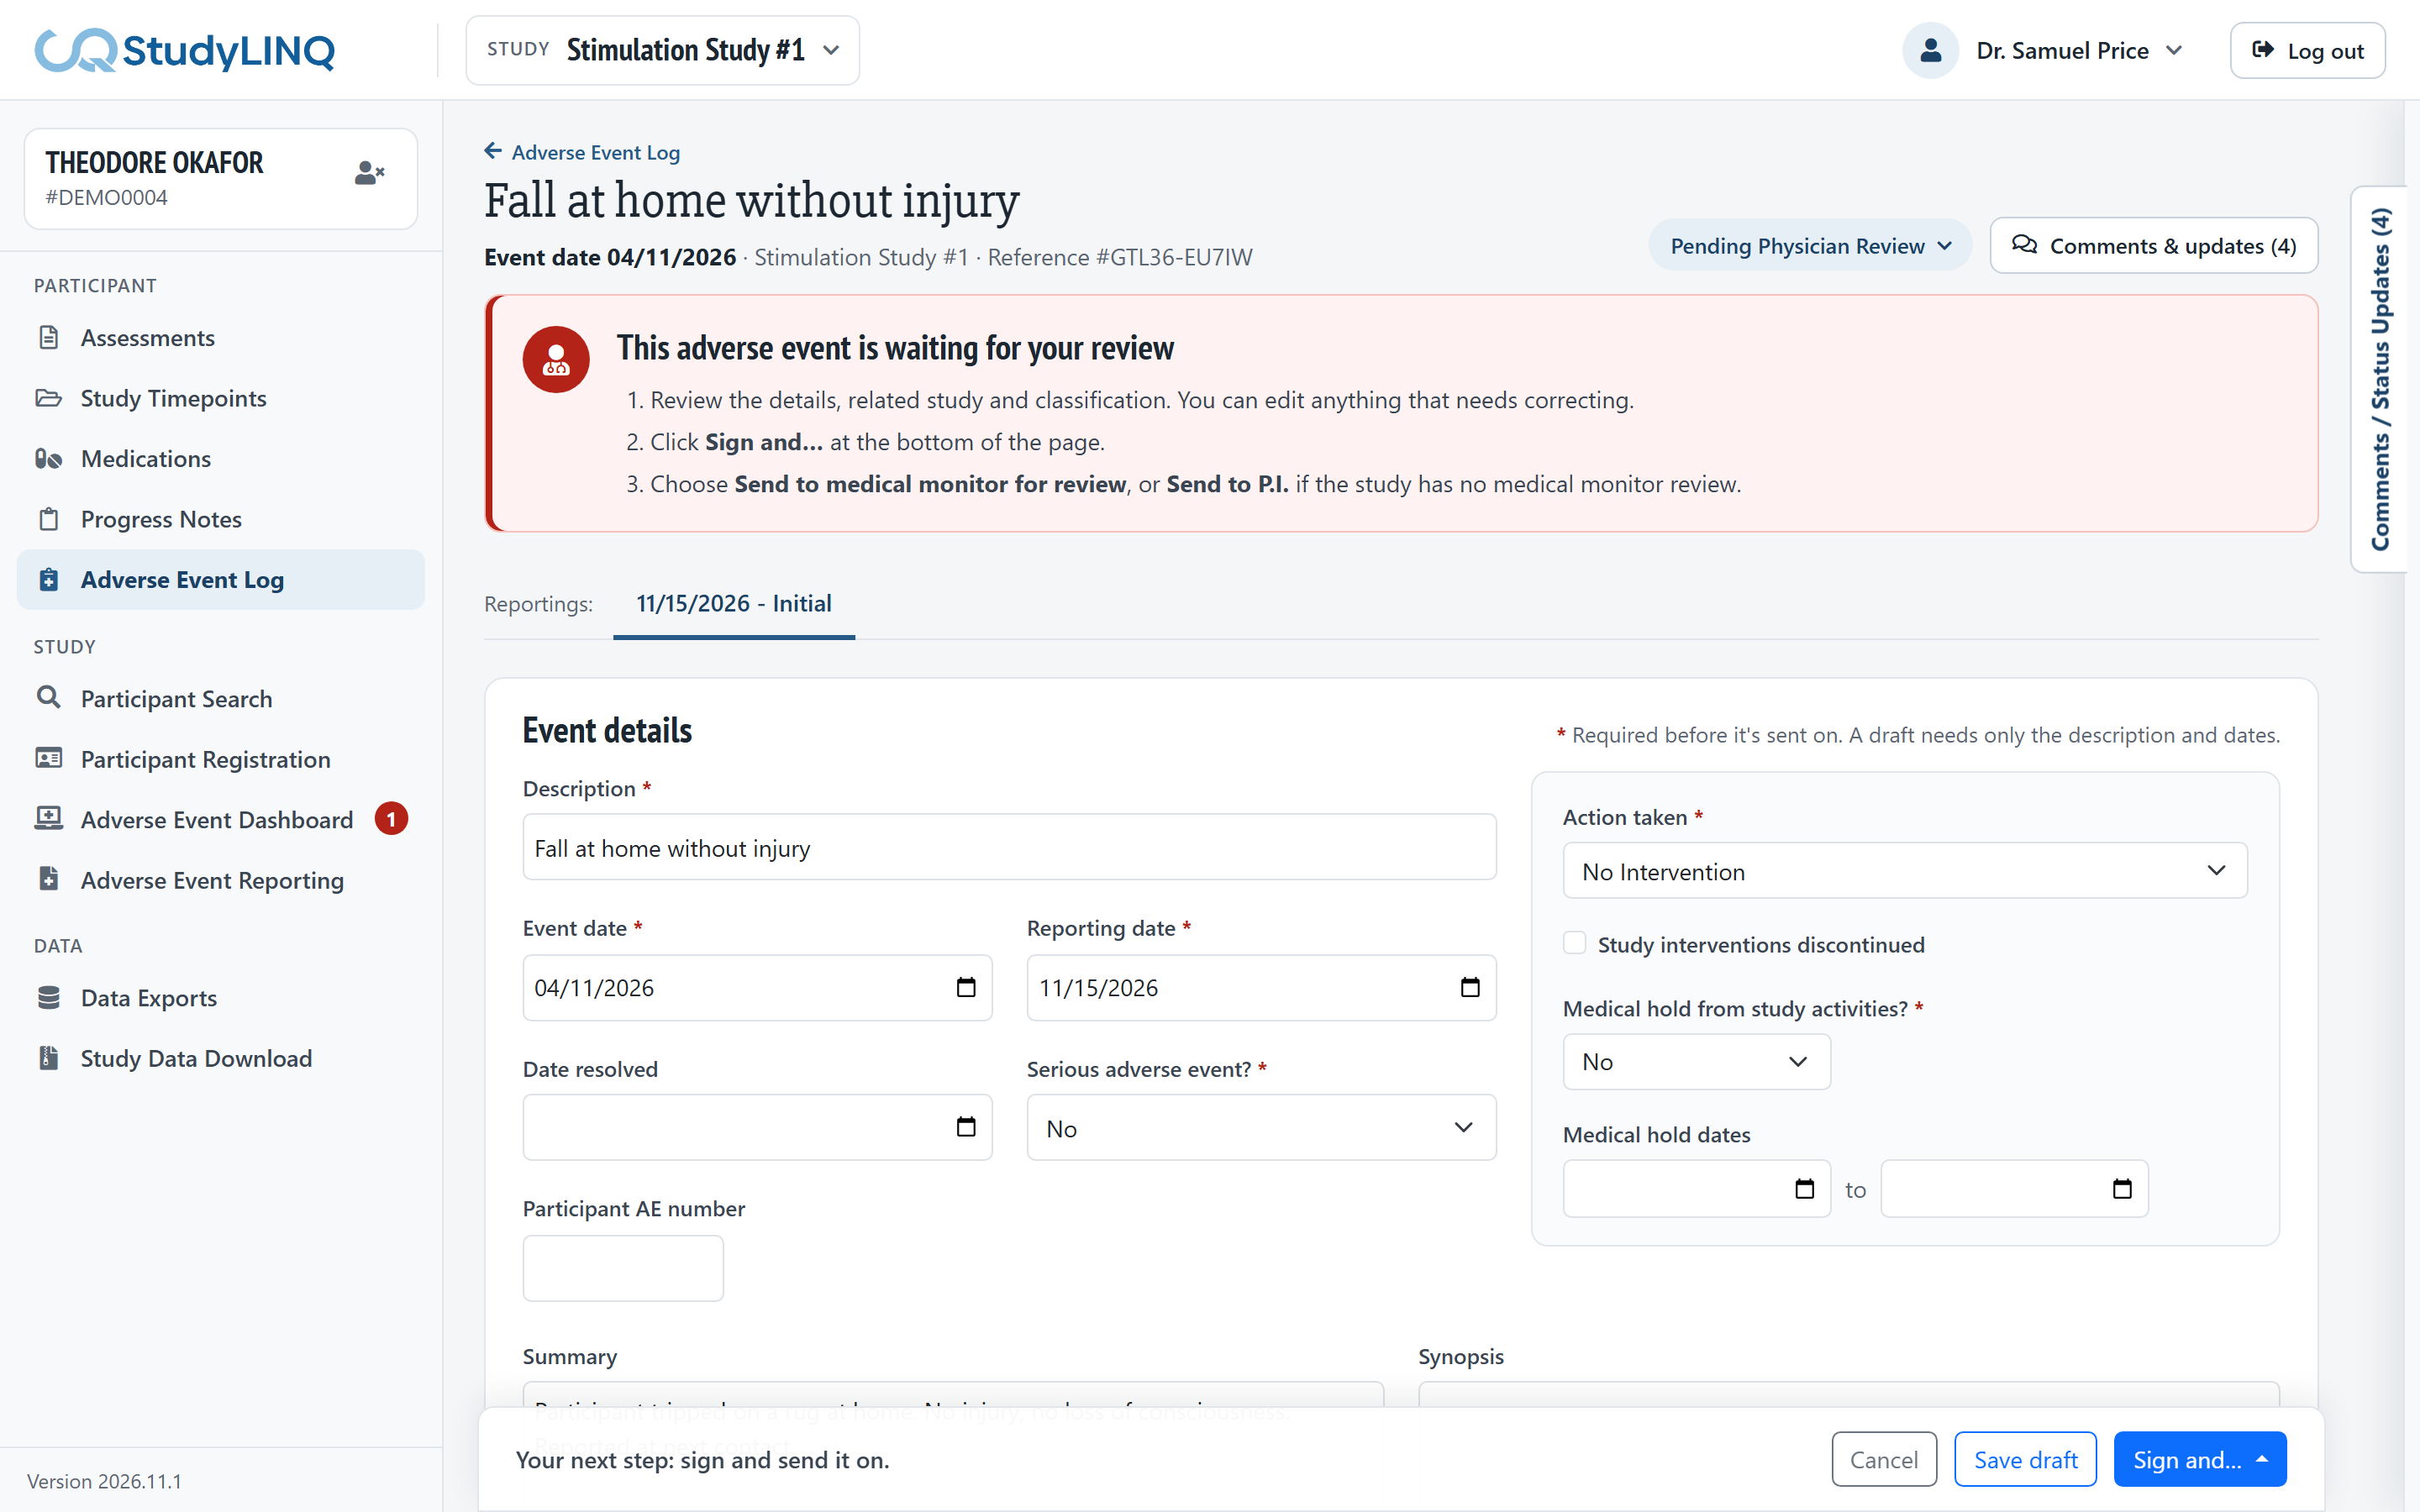
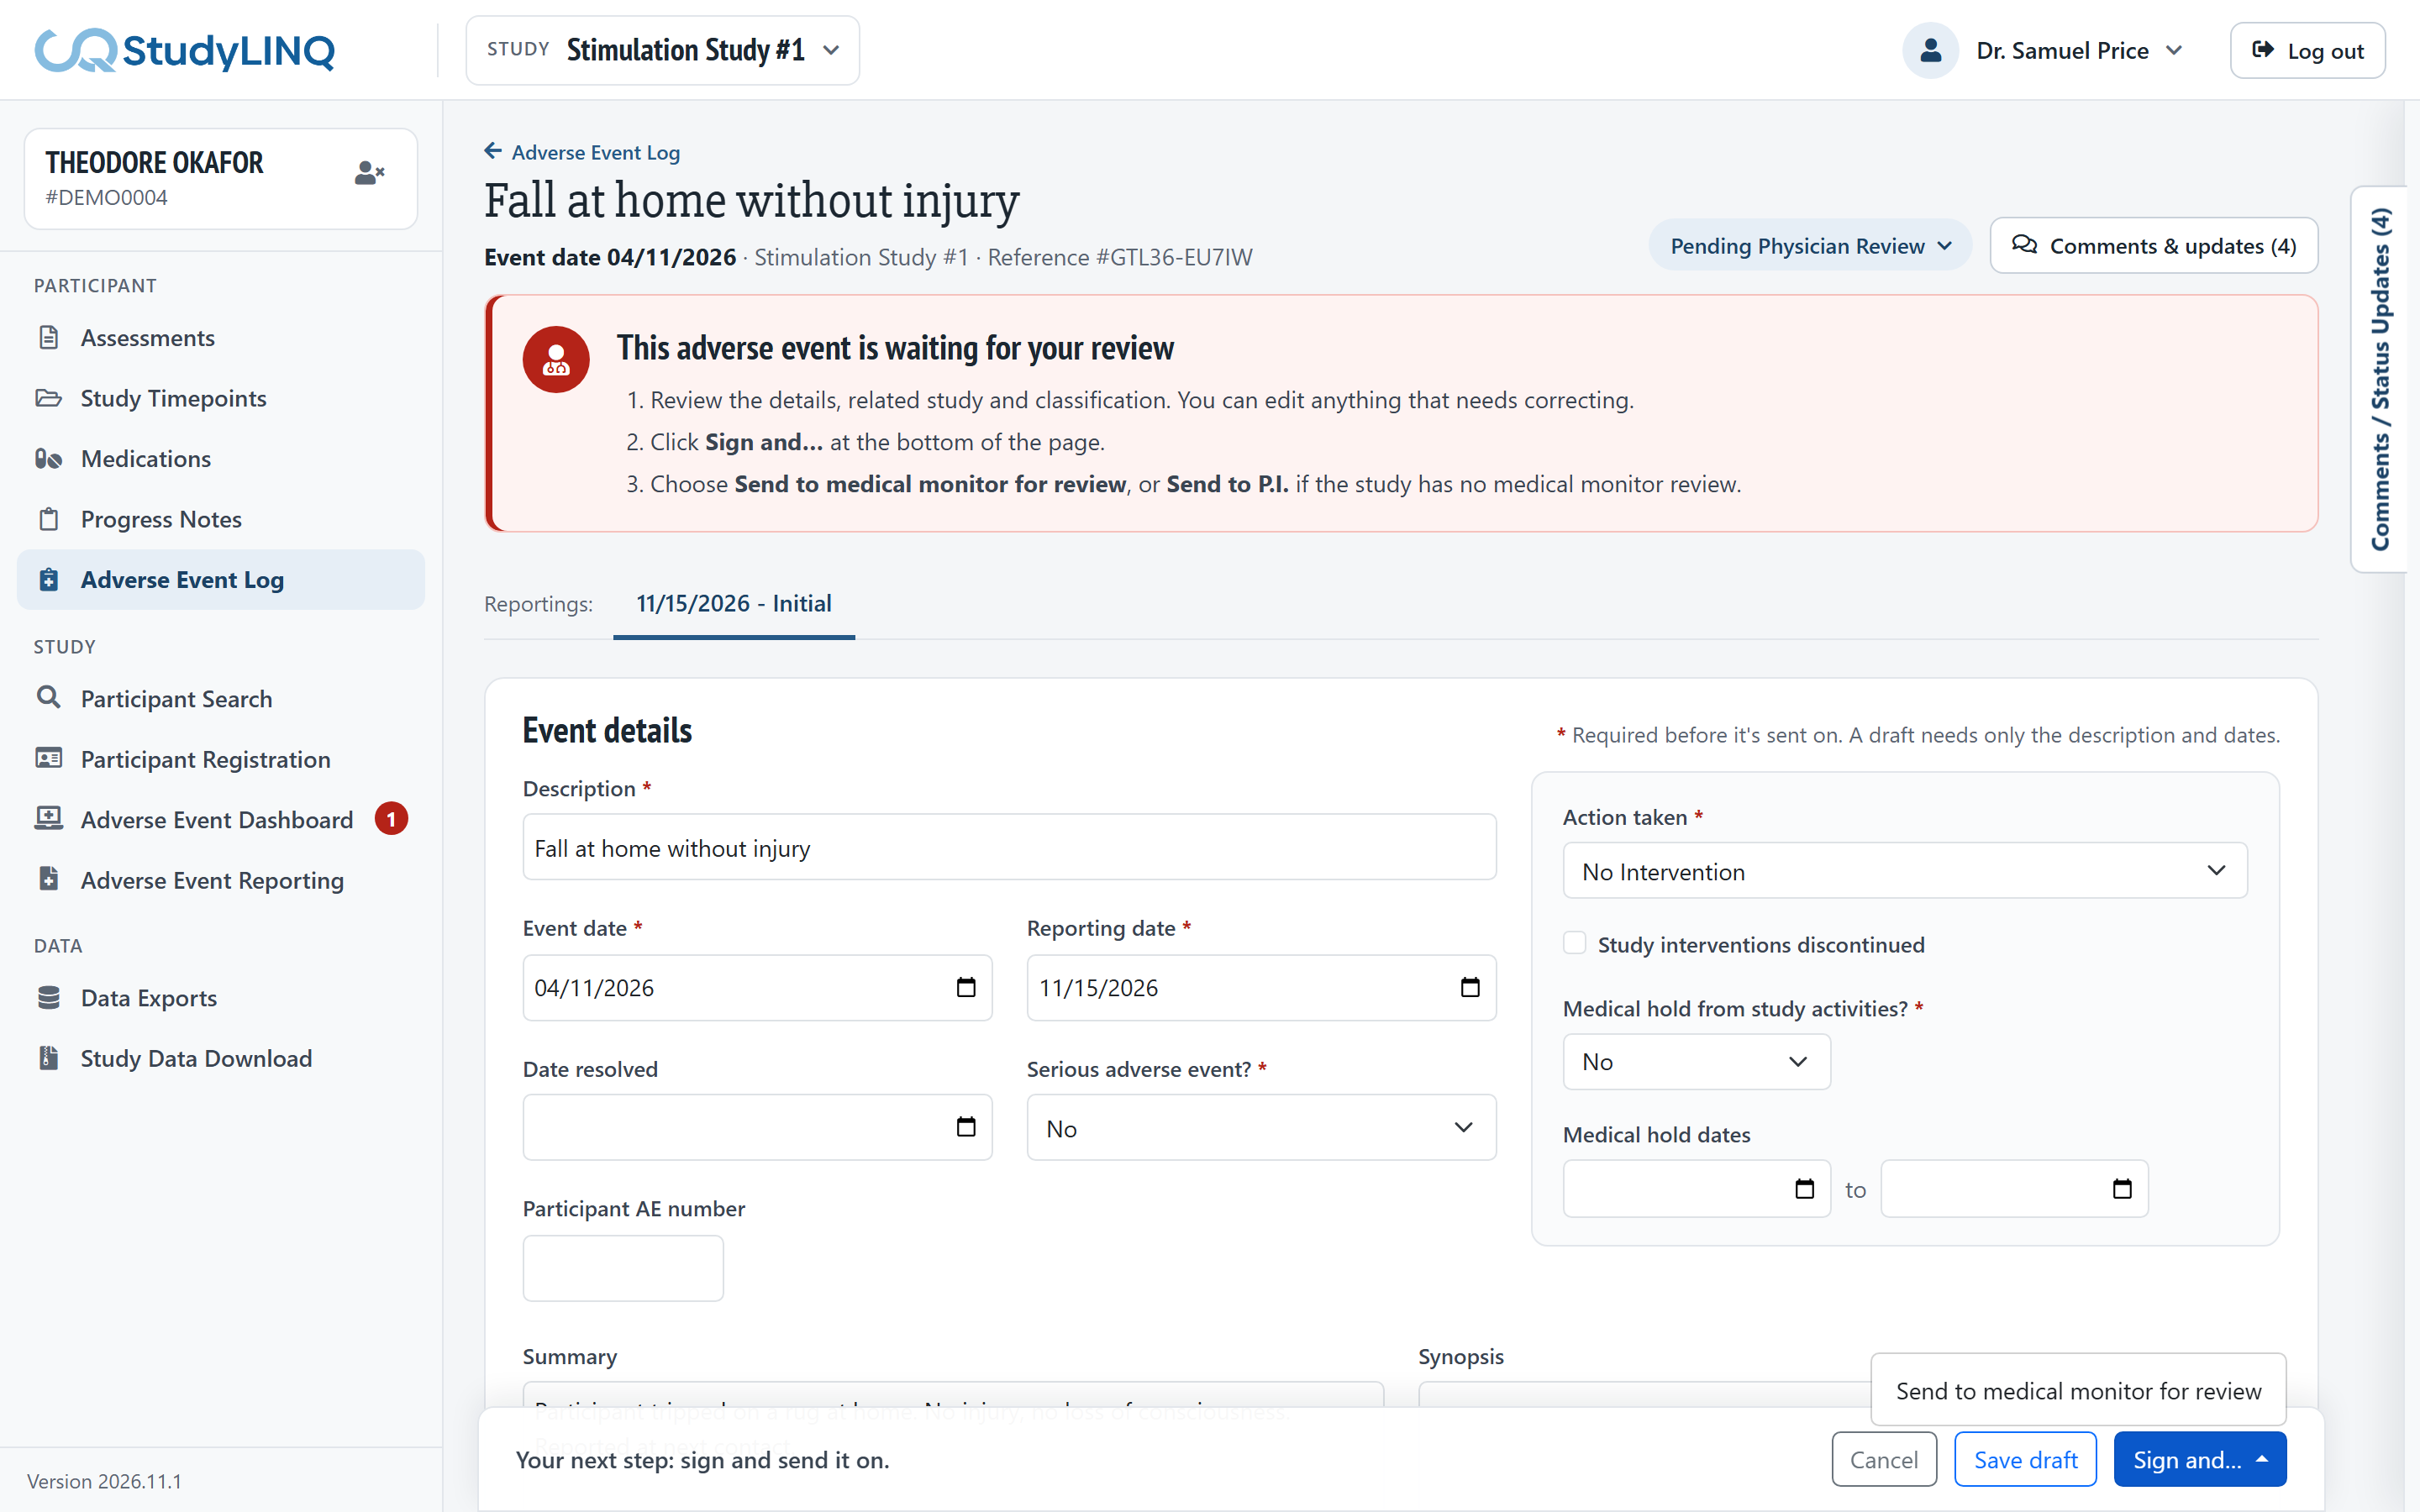
Open the event. The banner says This adverse event is waiting for your review.
-
Review the details, related study and classification, and correct anything that needs it.
-
Click Sign and…, then:
-
Send to medical monitor for review (when the study has a medical monitor), or
-
Send to P.I. (when it doesn't). Only the option that applies is shown.
-
-
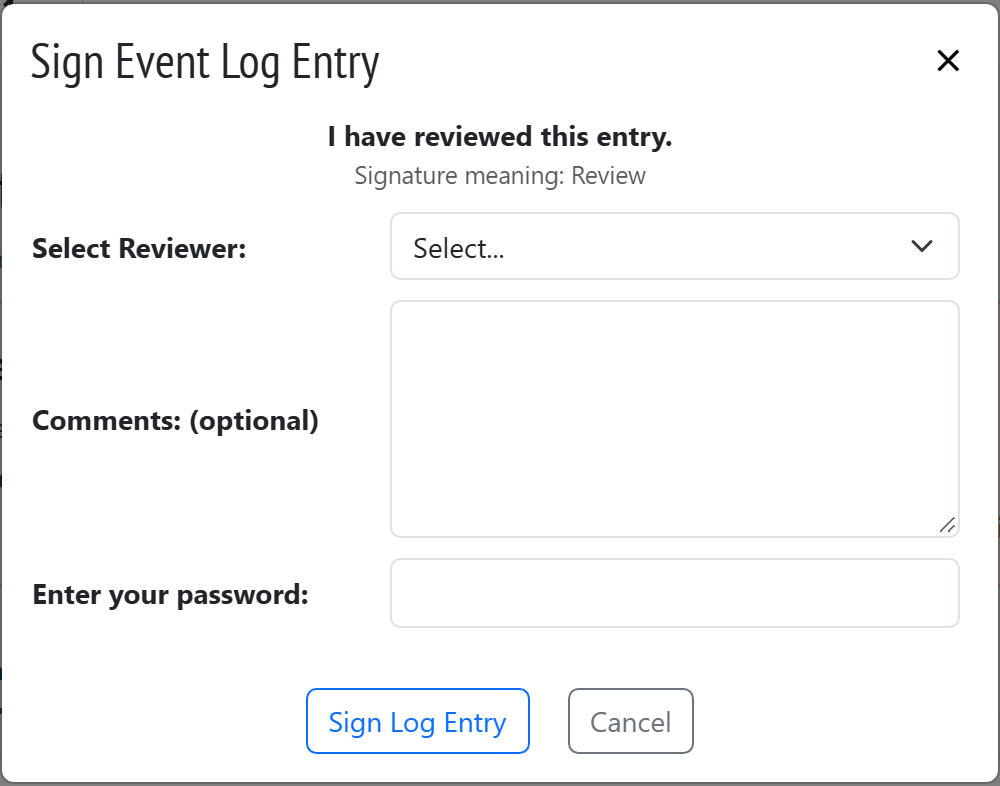
In the Sign window, choose the reviewer in Select Reviewer (medical monitor only), add Comments if you like, and enter your password.
-
Check the statement and Signature meaning shown, then click Sign Log Entry.
Medical monitor review
-
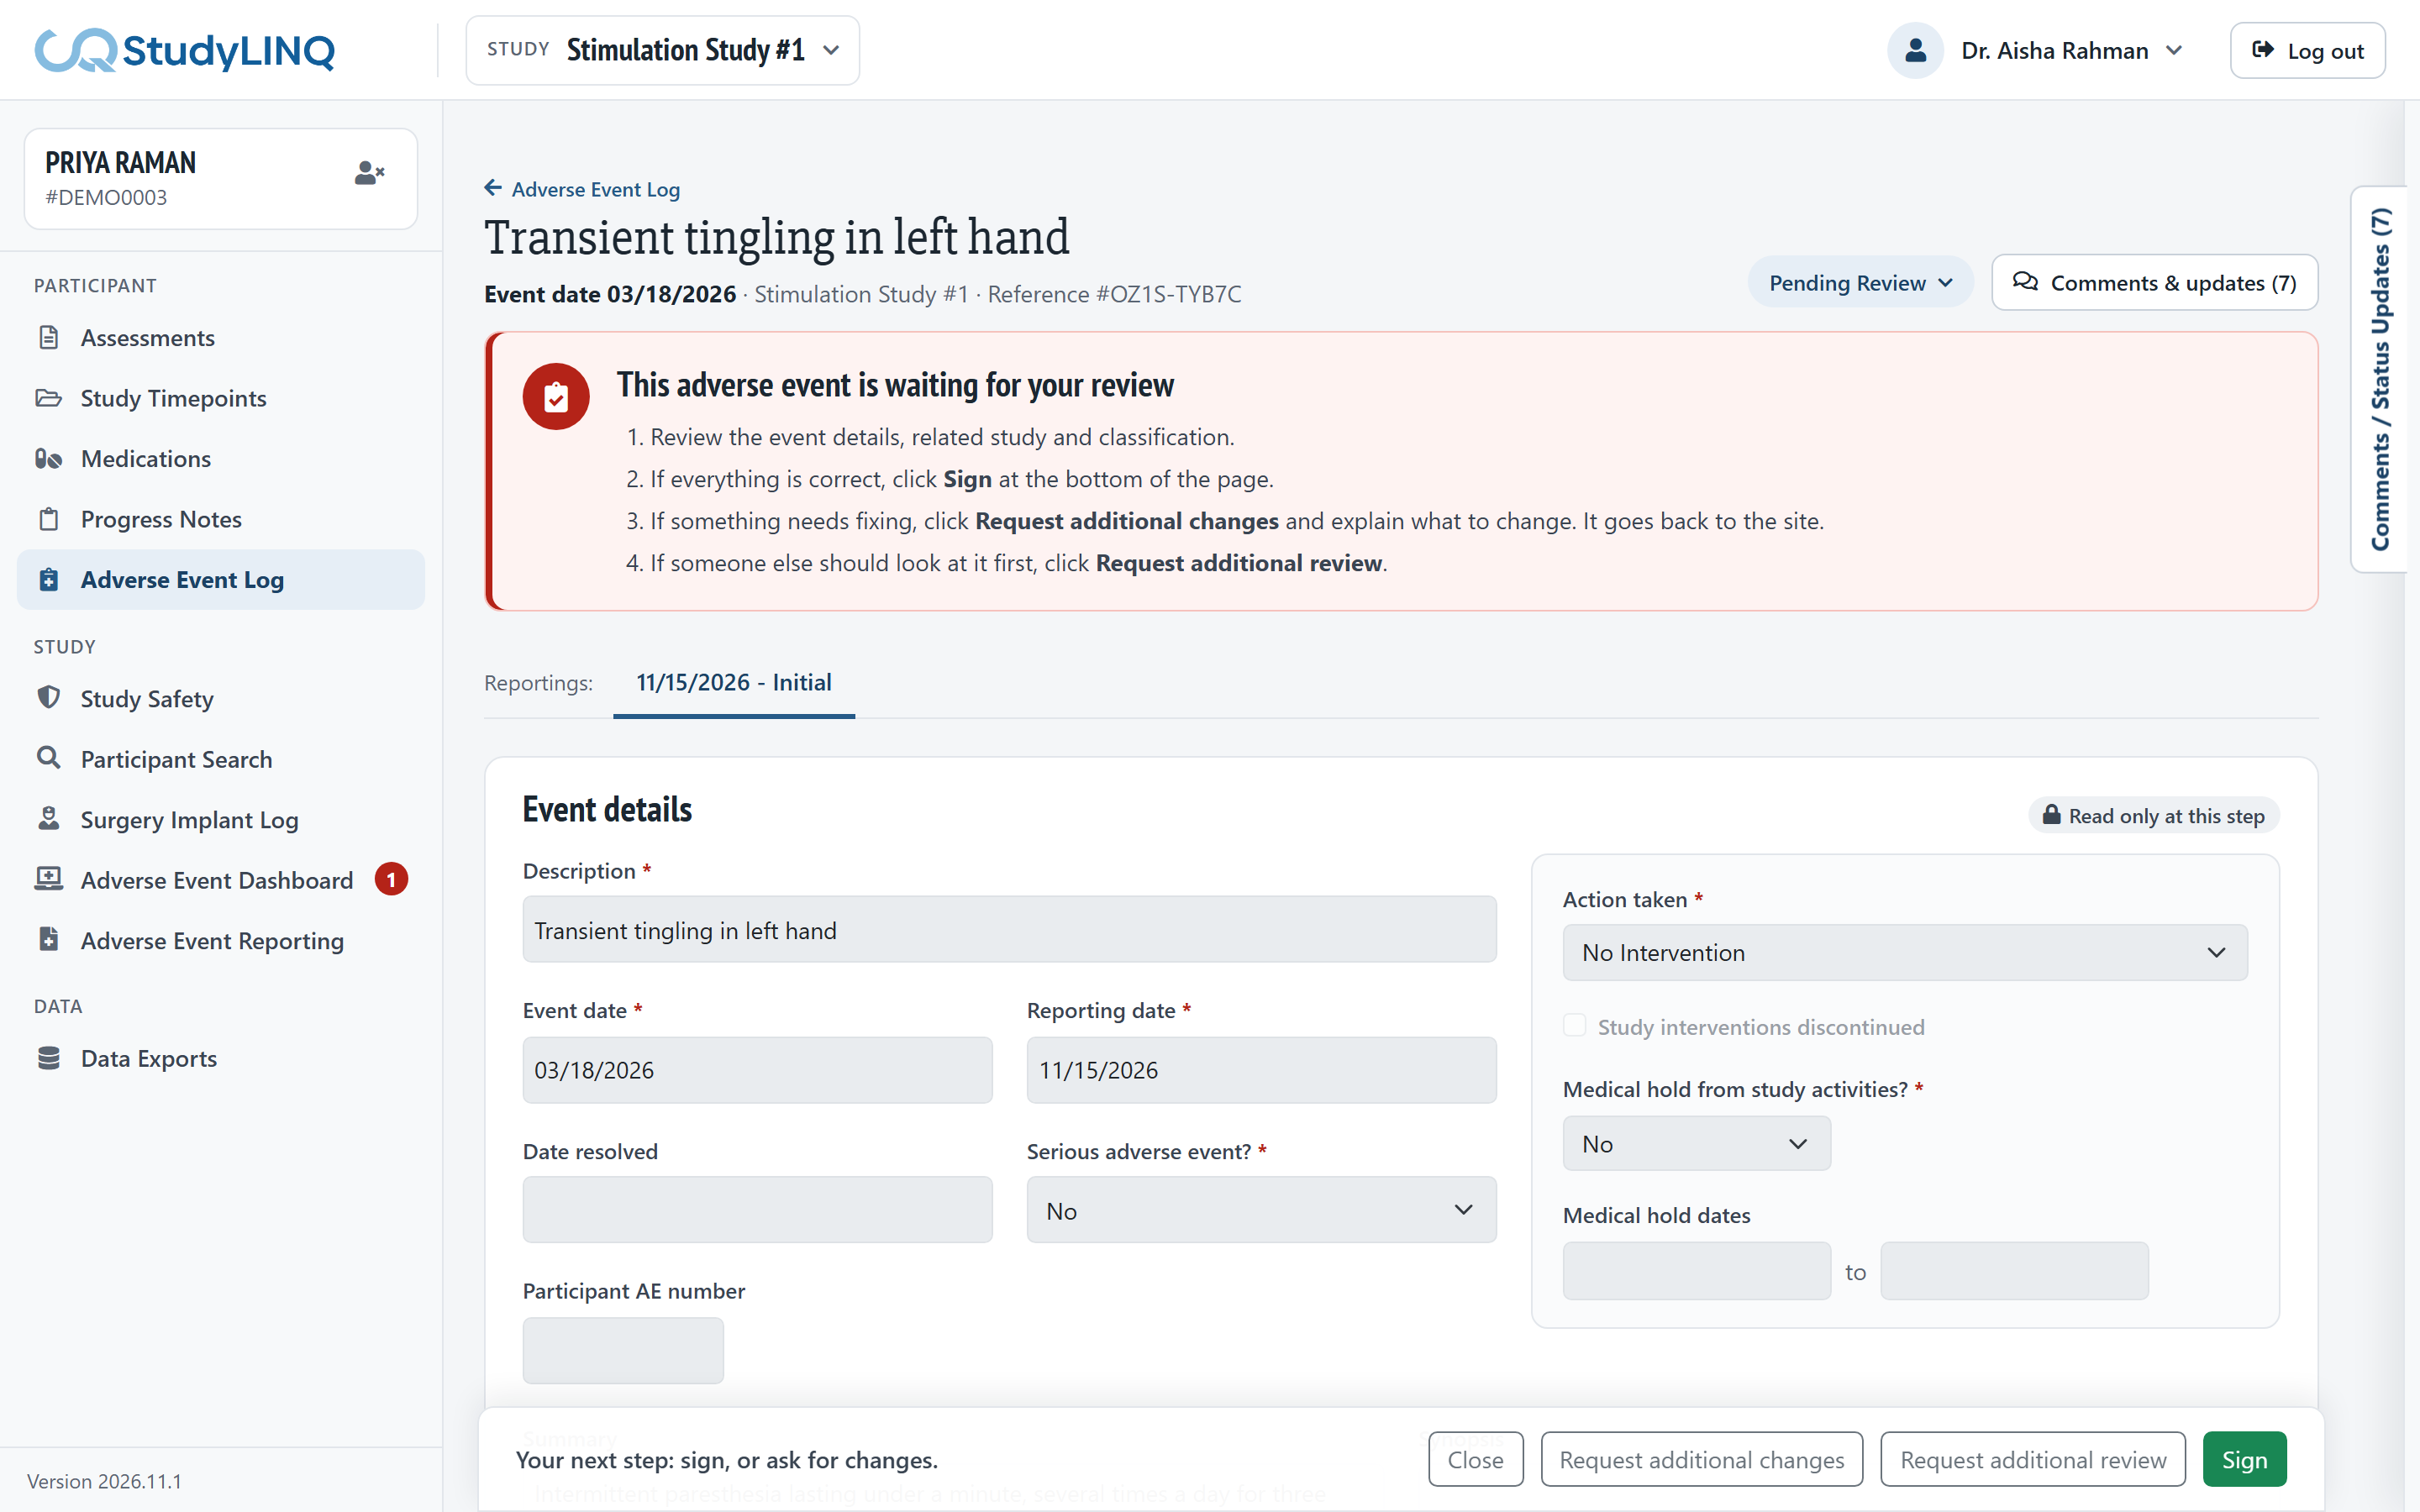
Open the event. The banner says This adverse event is waiting for your review.
-
Review the event details, related study and classification.
-
Choose one:
-
Sign – enter your password and click Sign Log Entry. The event goes to the P.I. (Pending PI Review).
-
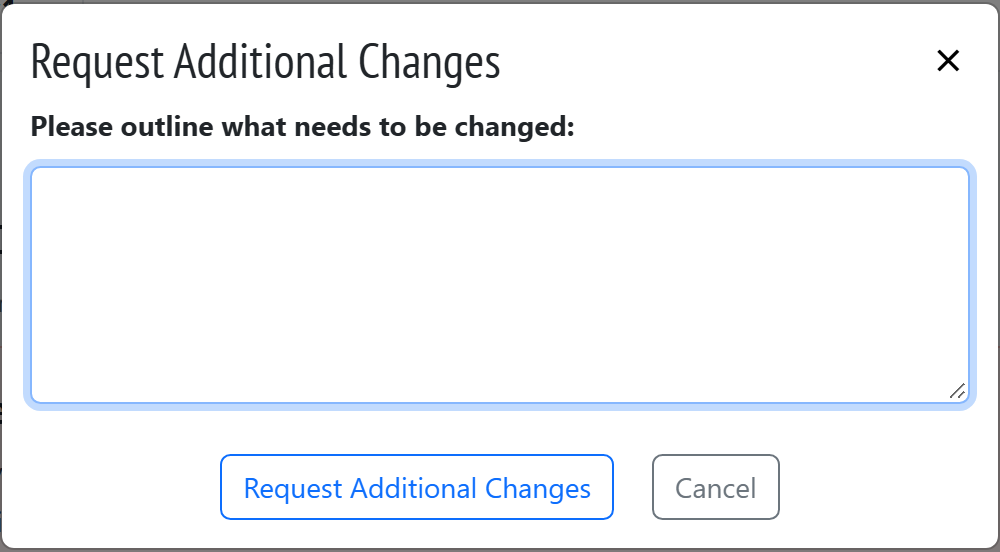
Request additional changes – explain what needs to change under Please outline what needs to be changed, then click Request Additional Changes. The event goes back to the site.
-
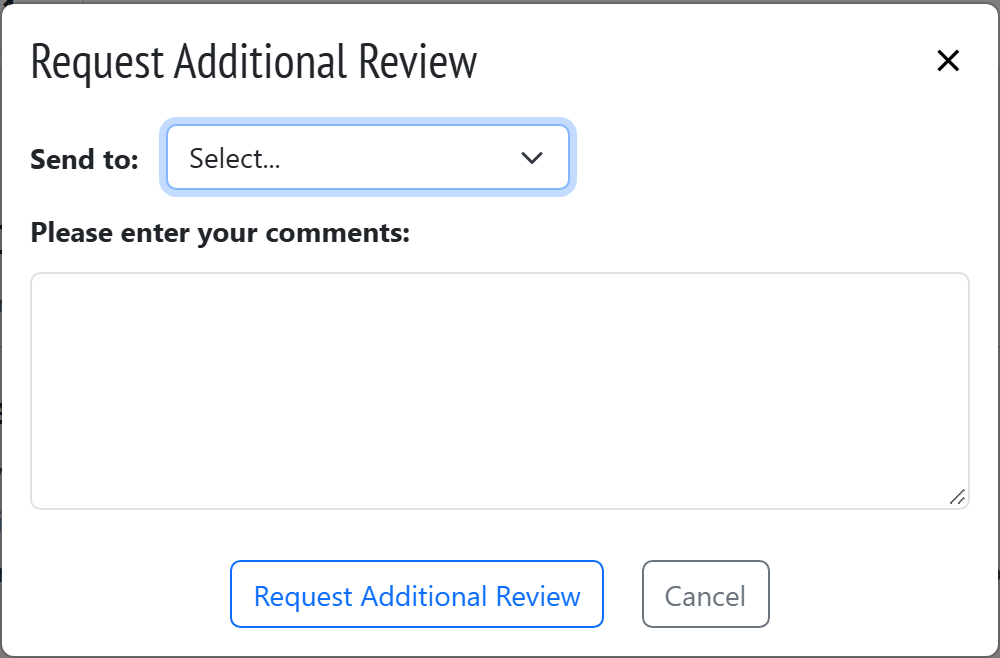
Request additional review – choose who should review it in Send to, enter your comments, then click Request Additional Review.
-

P.I. signature
-
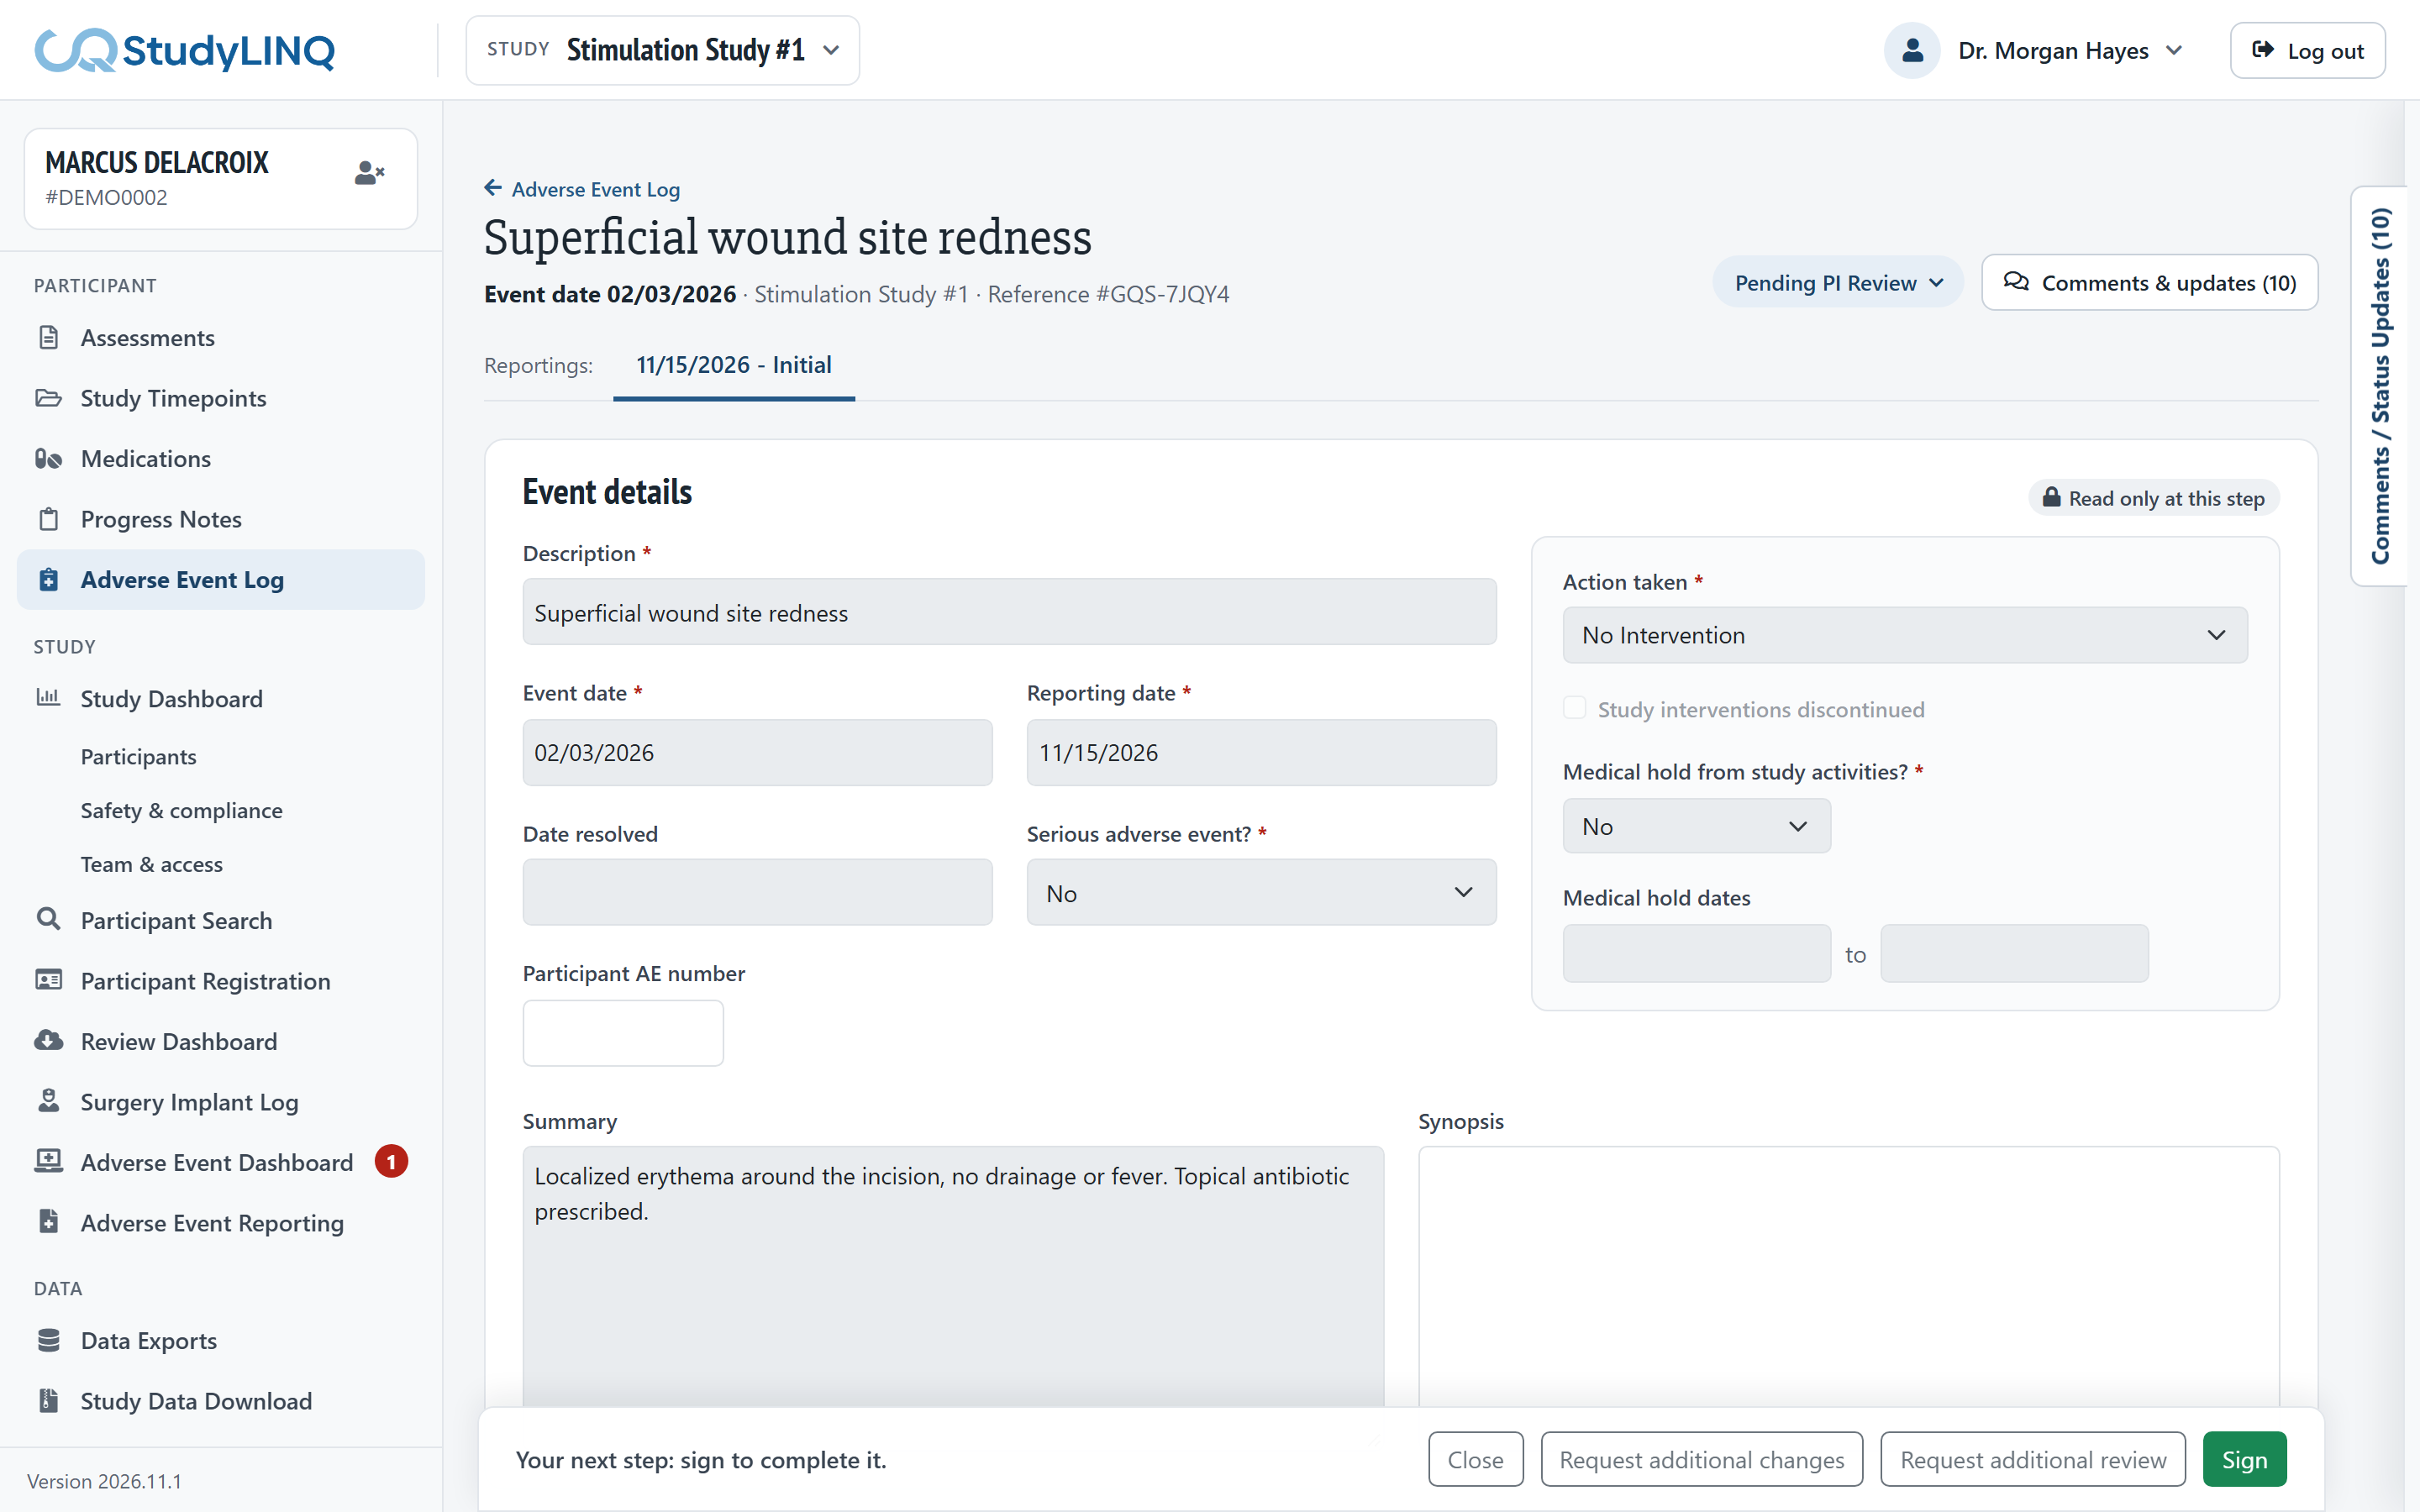
Open the event. The banner says This adverse event is ready for your signature.
-
Review the event, and the earlier signatures (click the status button at the top).
-
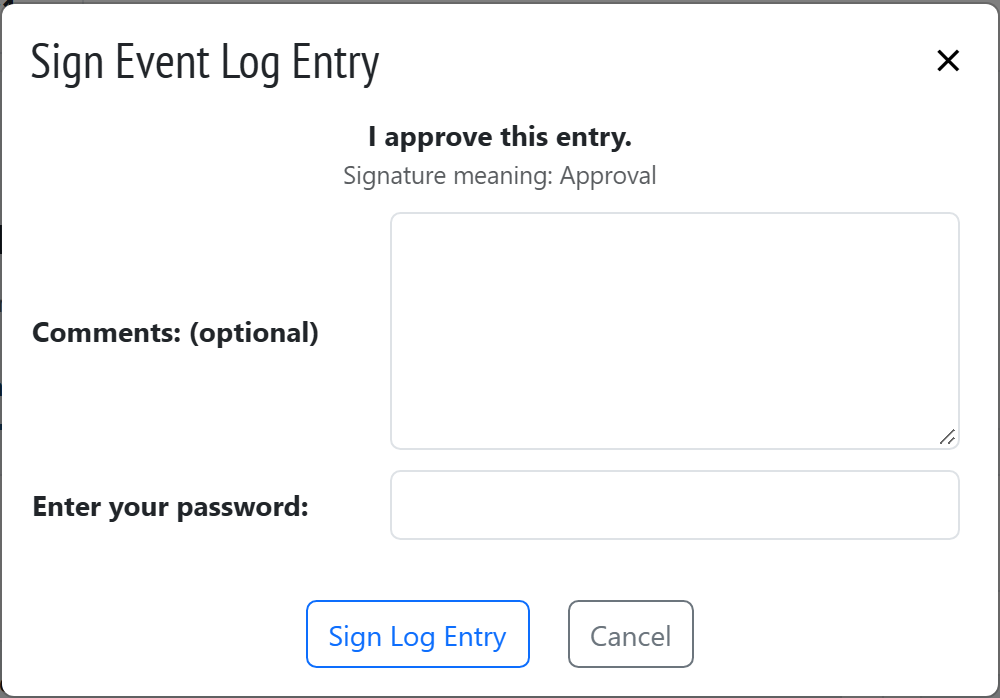
Click Sign, enter your password, check the signature meaning and click Sign Log Entry. The event is Signed.
You can also Request additional changes or Request additional review, as described for the medical monitor.
When changes are requested
-
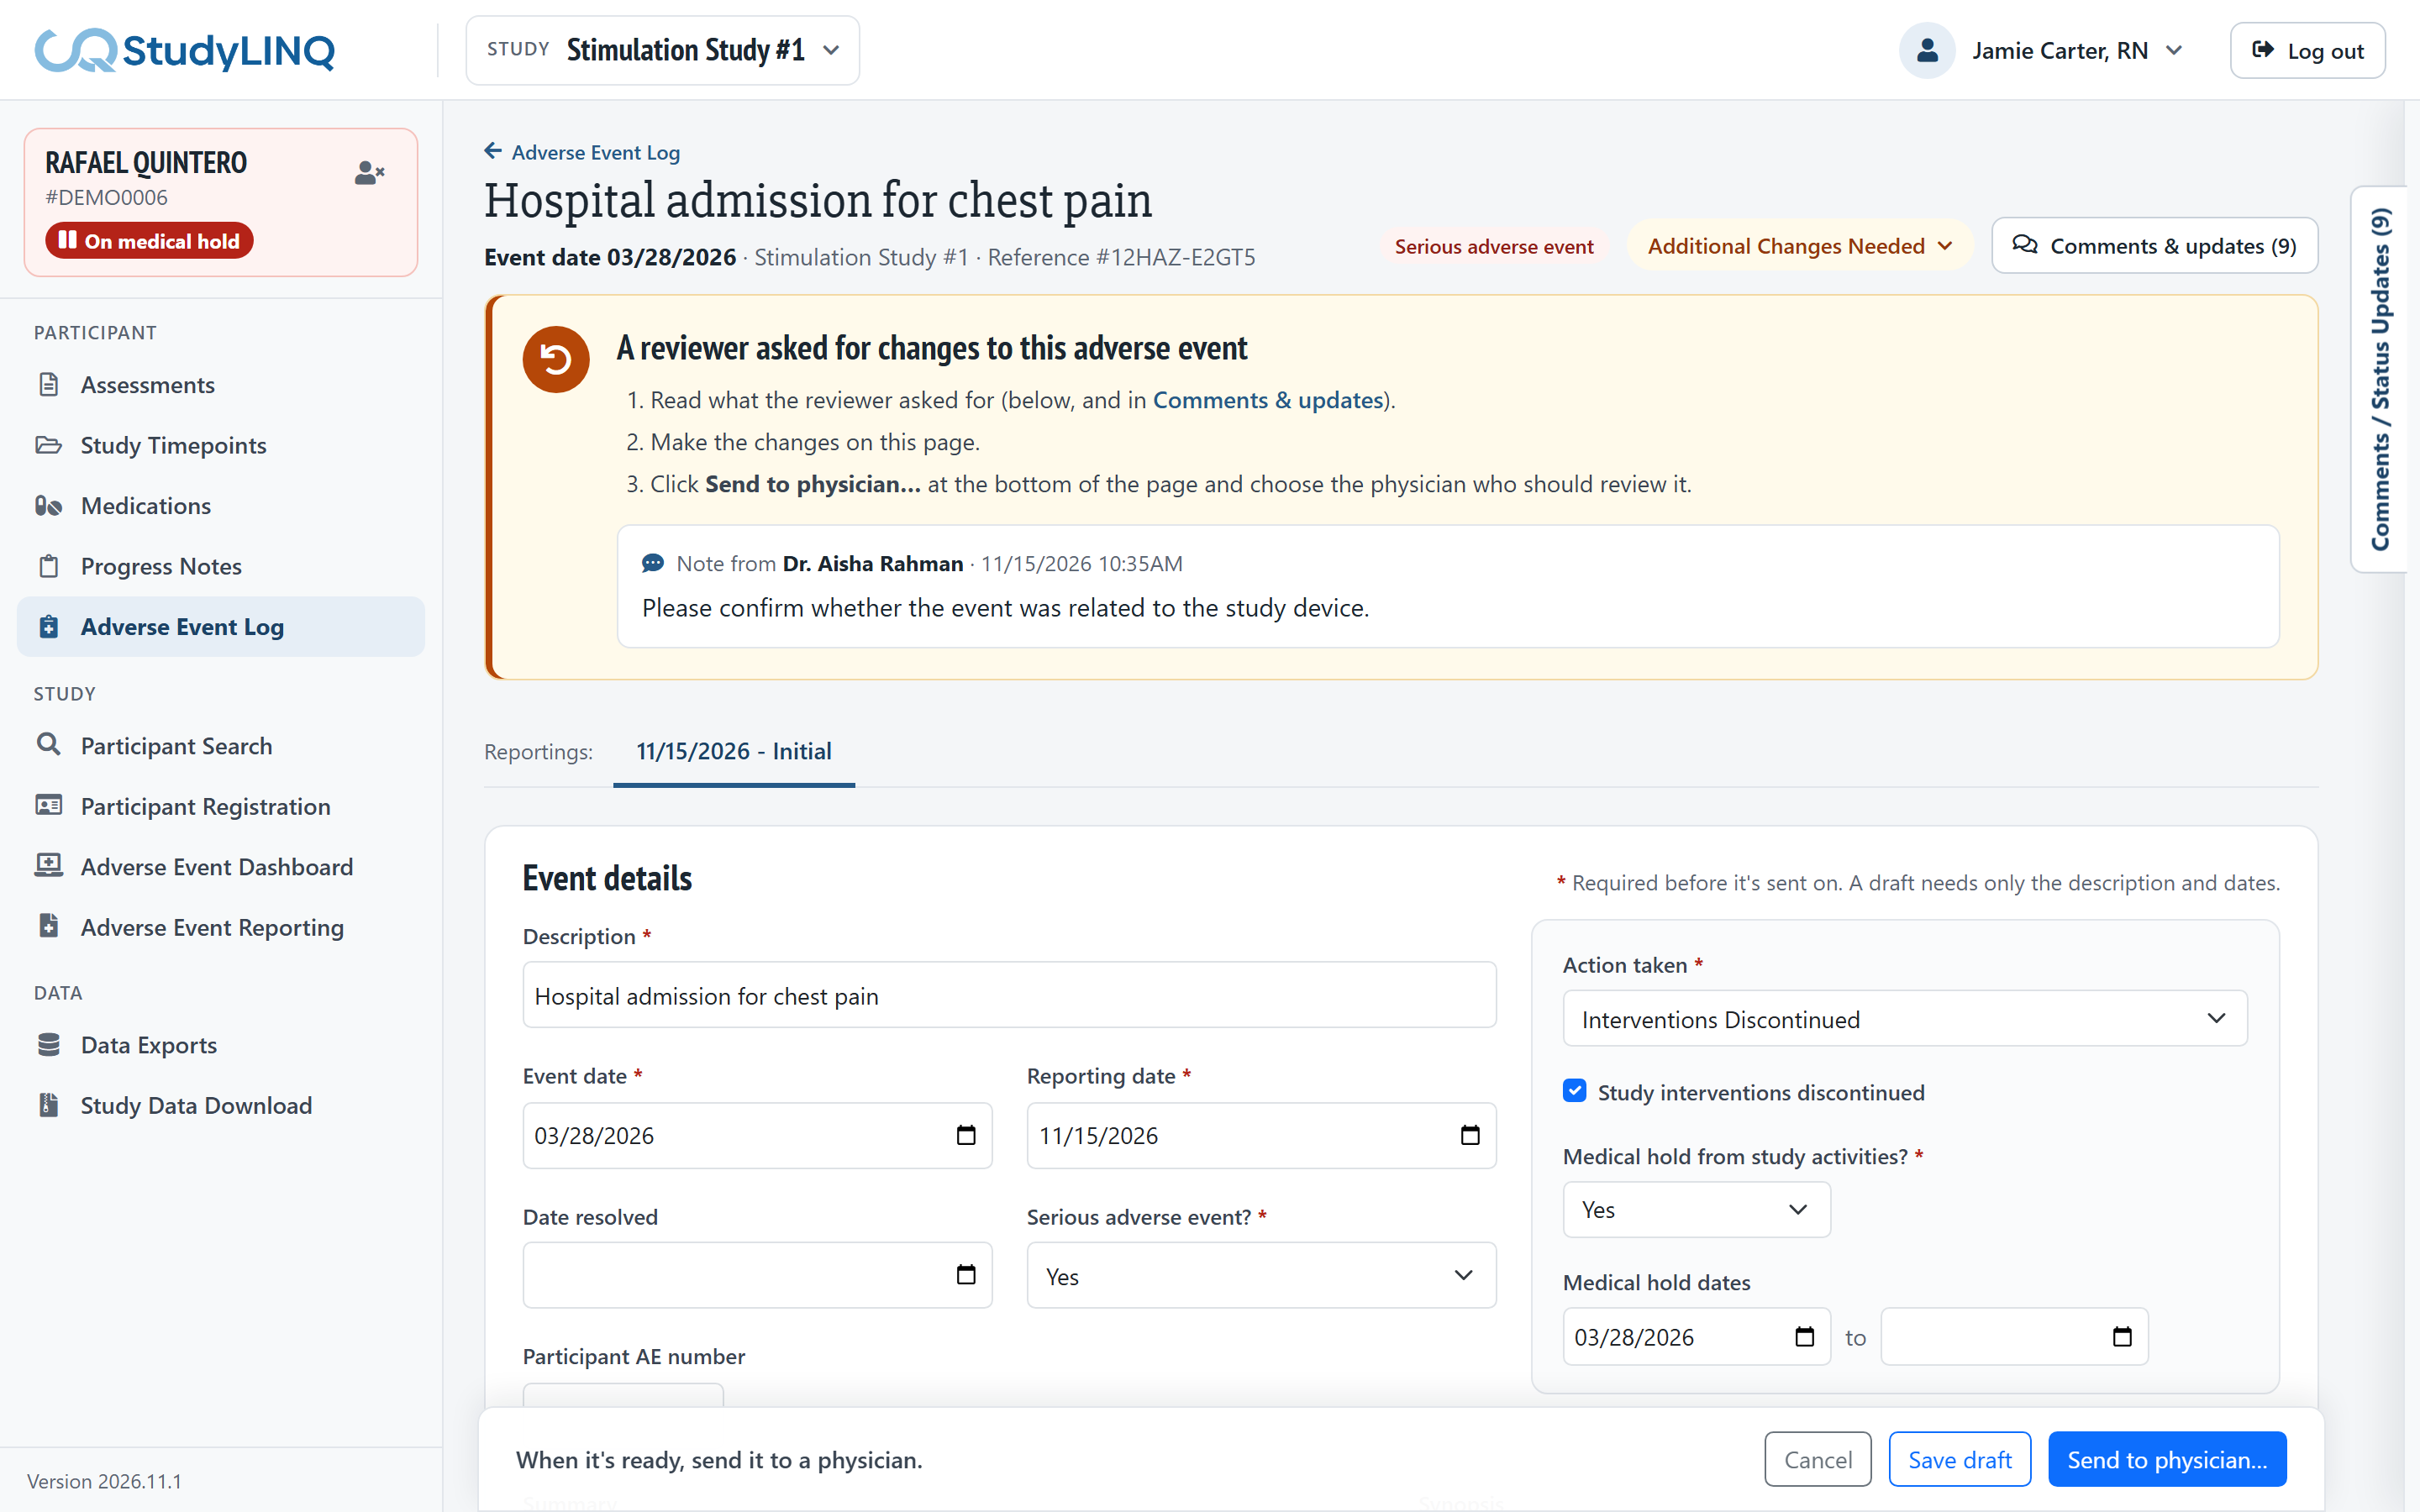
Open the event. The banner says A reviewer asked for changes to this adverse event and shows the reviewer's comment.
-
Click Comments & updates for the full history if you need it.
-
Make the changes.
-
Send it on again: nurses click Send to physician…; physicians click Sign and….
Electronic signatures and their meaning
Every signature on an adverse event asks for your password. The Sign window shows what your signature means before you sign:
|
When you sign |
Signature meaning |
Statement |
|---|---|---|
|
Sending on an event you entered or updated (from a draft, or after changes were requested) |
Authorship |
I am the author of this entry and confirm that it is accurate and complete. |
|
As the physician reviewing an event sent to you, or as a medical monitor or requested reviewer |
Review |
I have reviewed this entry. |
|
As the P.I., completing the event |
Approval |
I approve this entry. |
21 CFR Part 11: each electronic signature must state its meaning and be linked to the signer by re-entering their password when signing (§11.50, §11.200). The signature is stored with your name, the date and time, and the meaning, and appears on adverse event reports.
Seeing the review progress and signatures
-
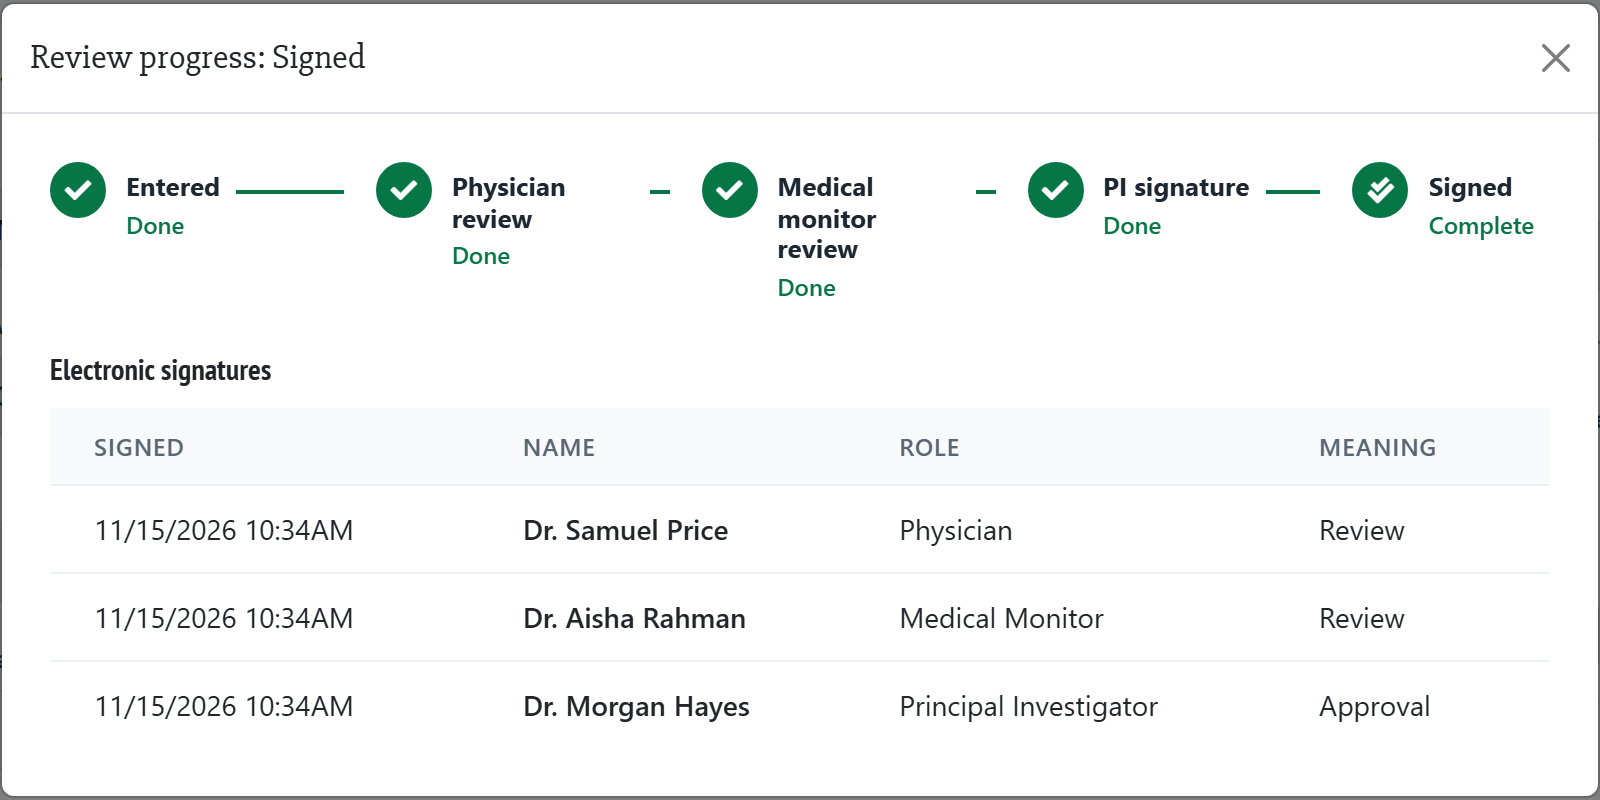
Click the status button at the top of the event.
-
Review progress shows each step, who the event is with (Currently with), and under Electronic signatures every signature with its date, name, role and meaning.
Comments and updates
-
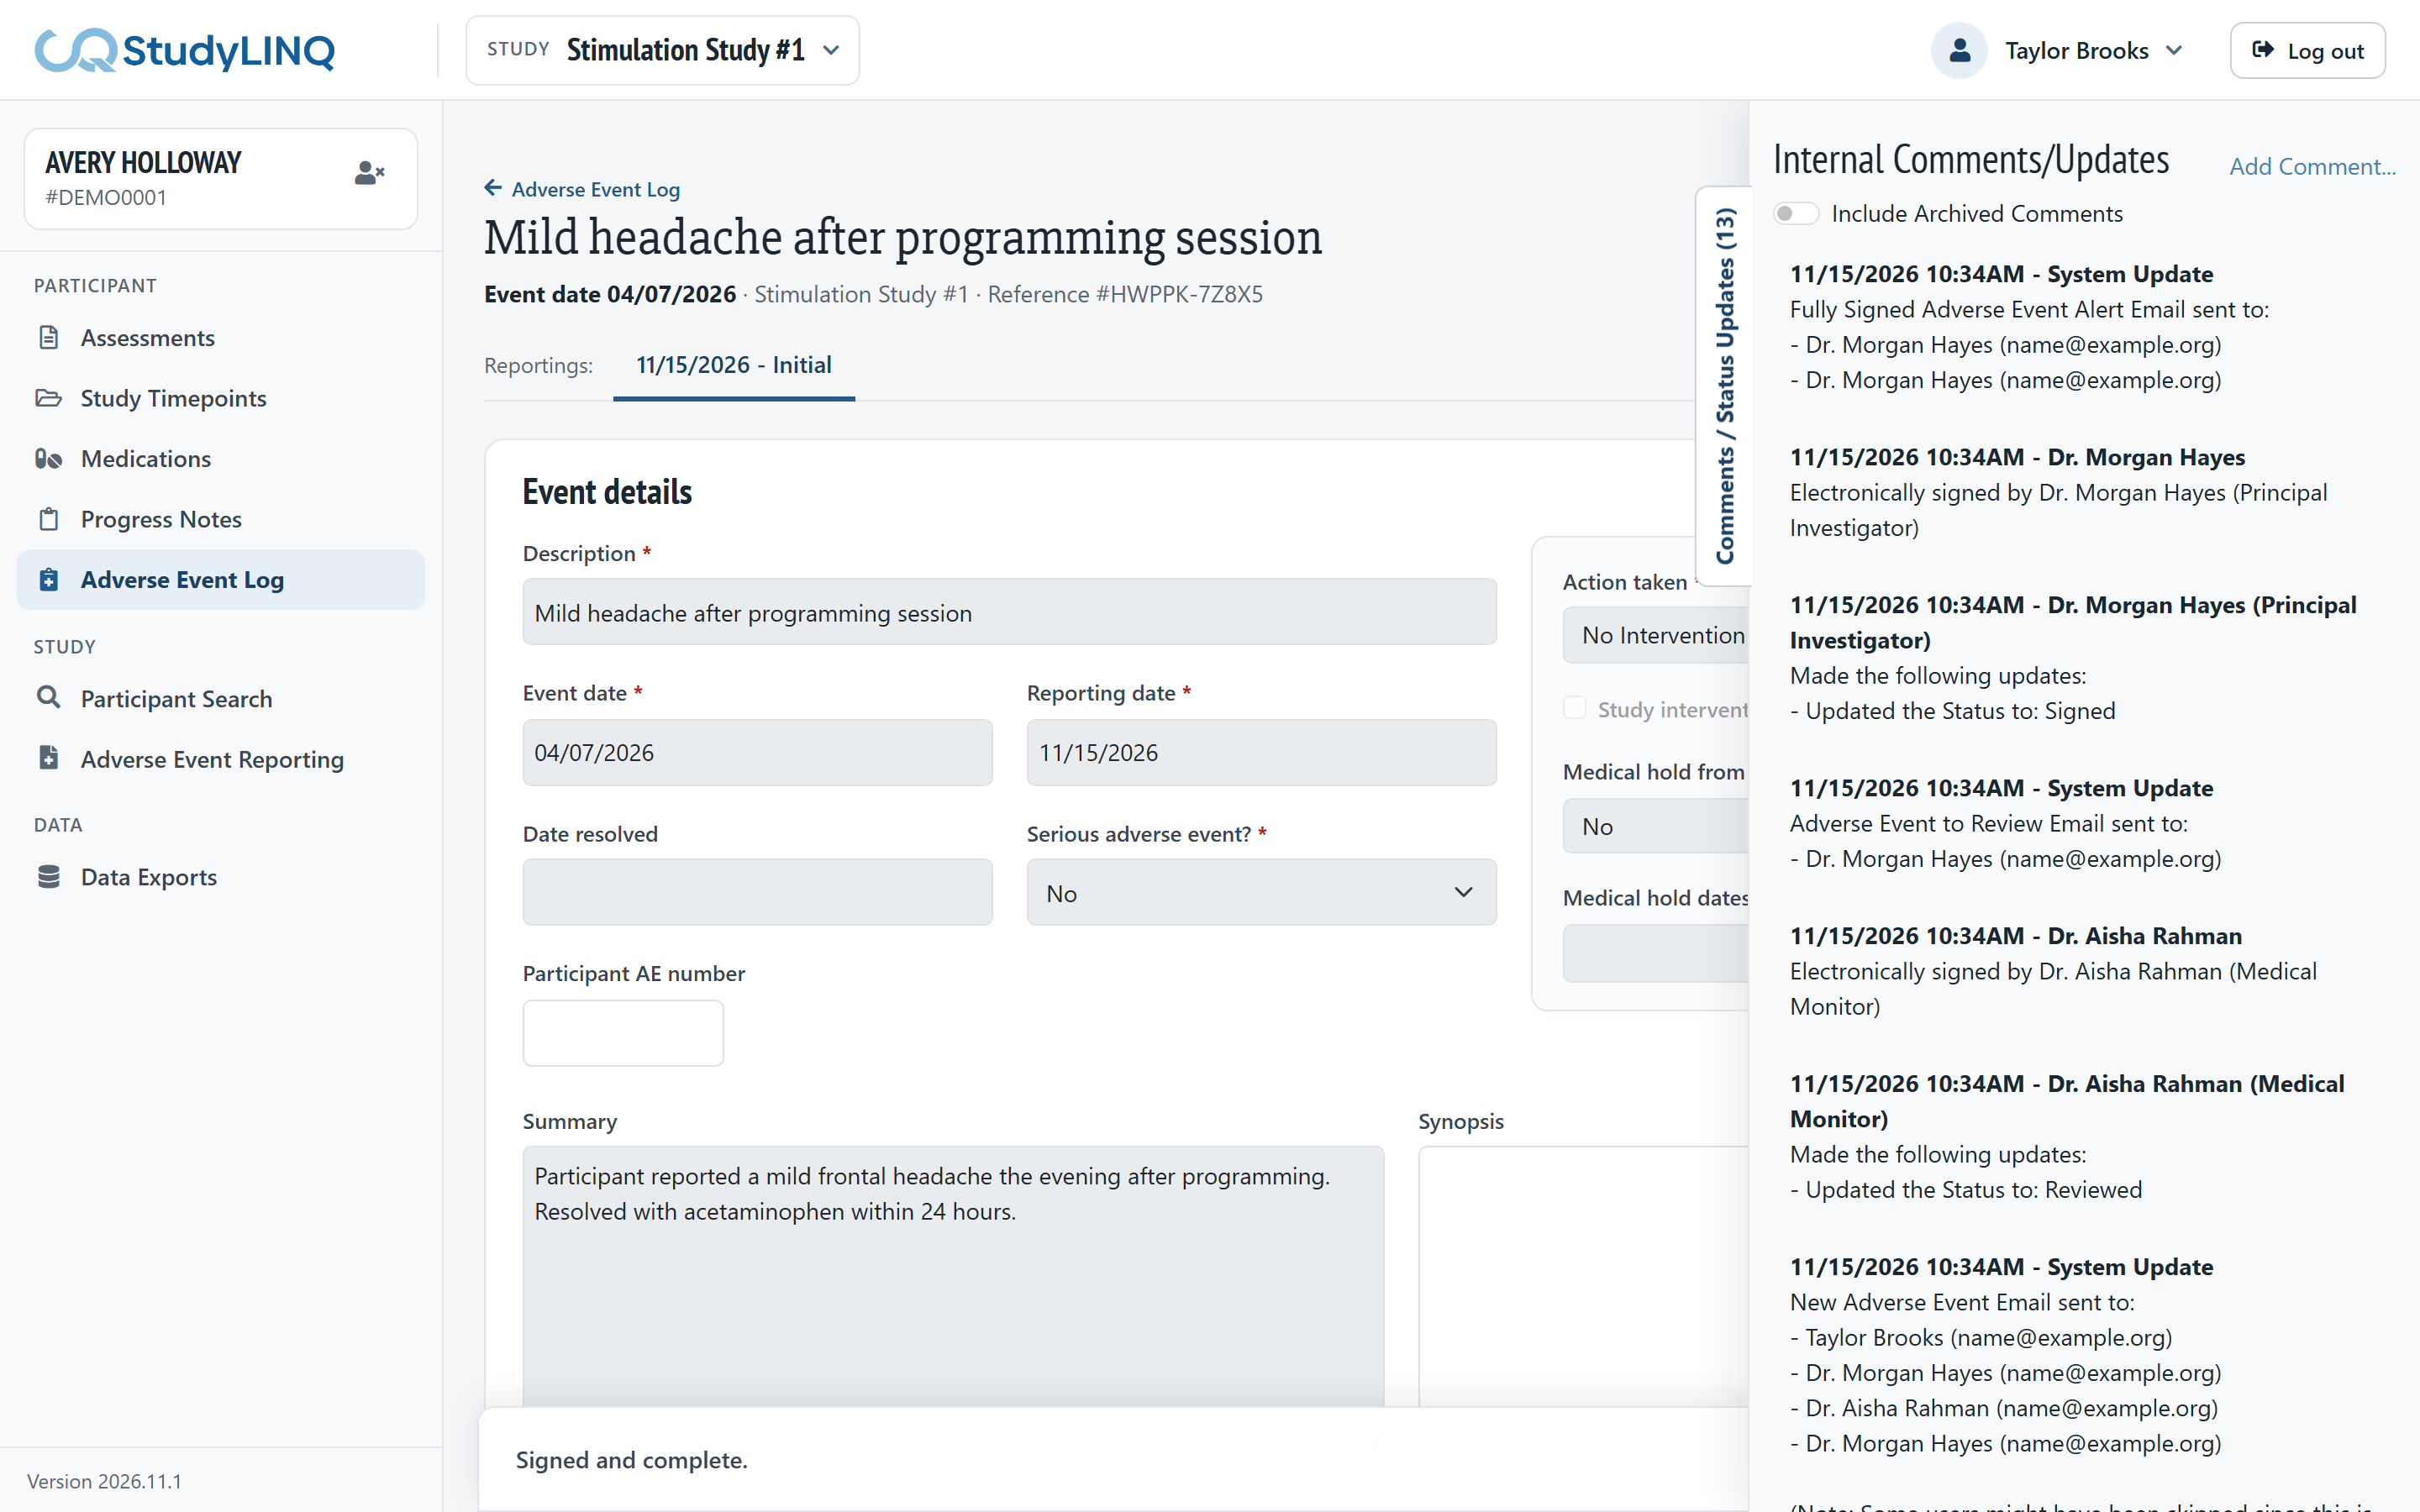
Click Comments & updates at the top right. The comments open at the side of the page, with every status change and comment.
-
To add one, click Add Comment…, type it and click Add Comment.
You can edit or archive your own comments until the event is signed. Tick Include Archived Comments to see archived ones.
Attaching files
-
Under File Attachments, click Attach File….
-
Choose the file and click Attach.
Click a file to open it. Files can be added while the event is a draft or changes are requested. To archive a file, open its details and click Archive; tick Include Archived to see archived files.

Generating an immediate report
-
Under Immediate reportings, choose the body in Generate a report for.
-
Choose whether to Include study status, Include group and Include stimulation.
-
Click Generate report. The event is saved first, and the report is listed with the date reported.
-
When the body replies, click Upload response on that report's row and attach the response.

Reports and responses can be added after the event is signed.
Creating a follow-up
To add new information to a signed event, create a follow-up. It starts as a new draft linked to the original event.
-
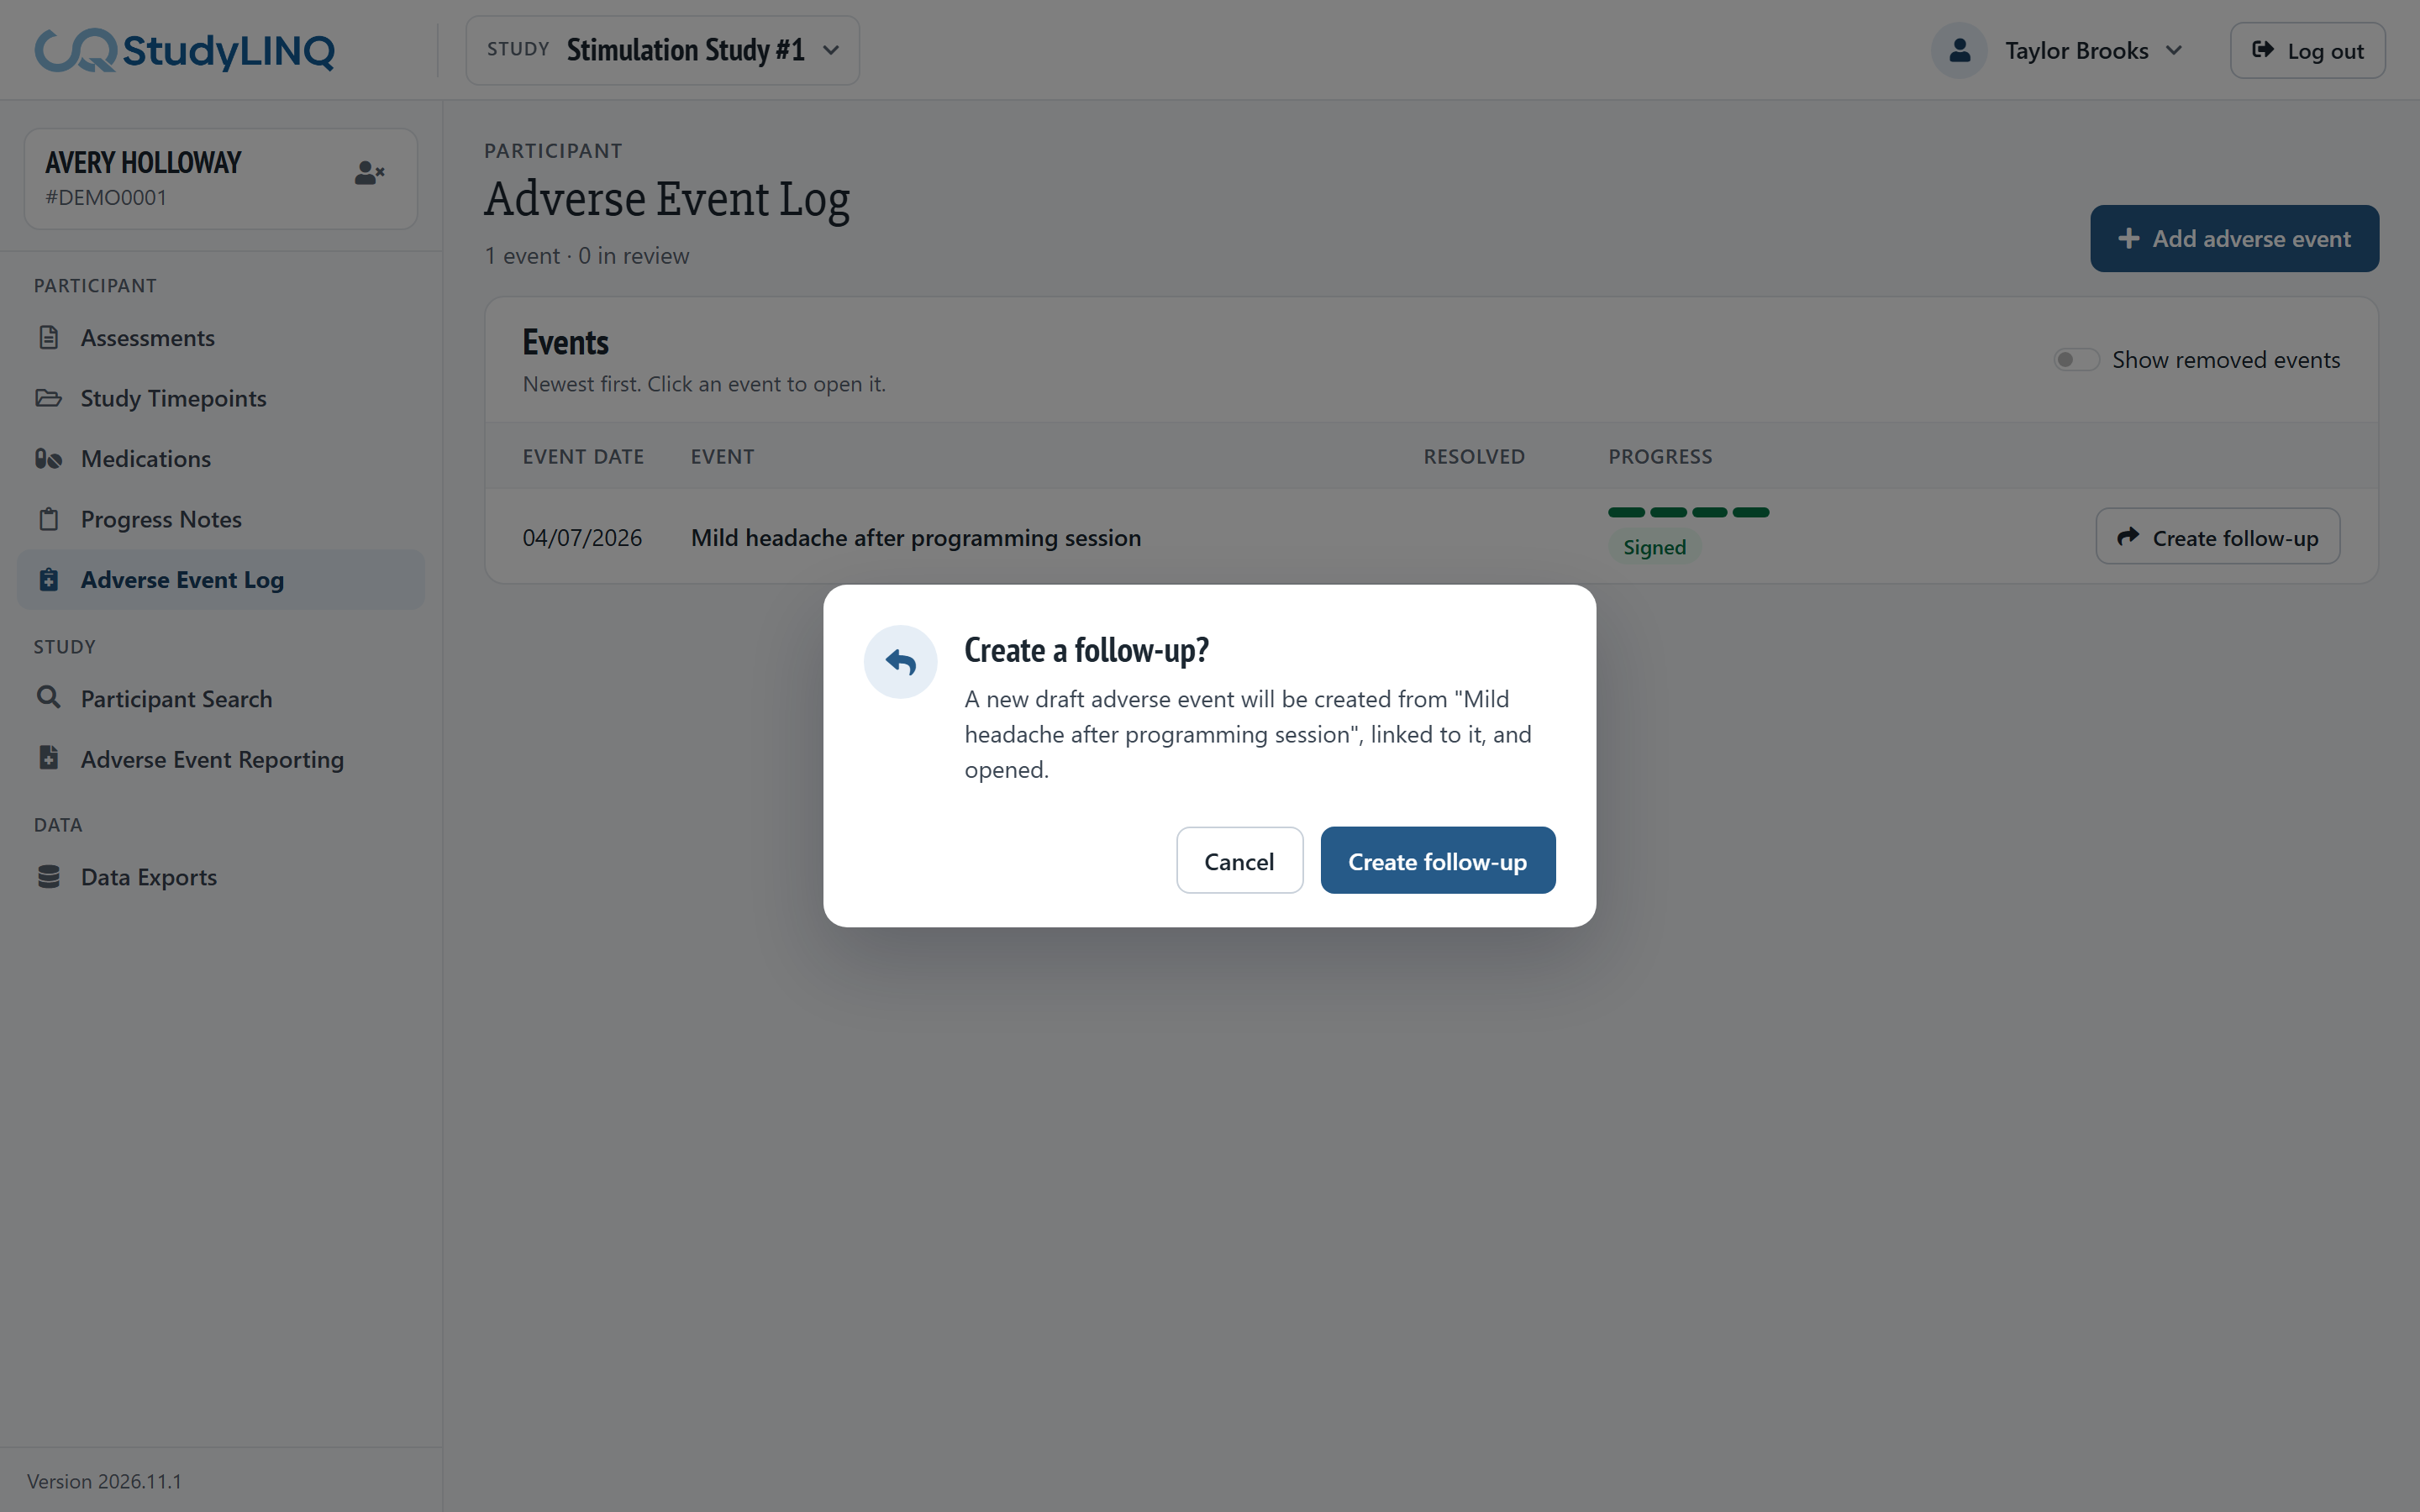
In the participant's Adverse Event Log, click Create follow-up on the signed event.
-
Confirm. The follow-up opens; complete and send it like any other event.
The original and its follow-ups are listed under Reportings at the top of the event.